

Thanks! Seeing it now it’s indeed a shame of the Scorpio. This was actually back in 2007, so there were still quite some Scorpio’s around at that time. Nowadays I wouldn’t scrap a Scorpio anymore for its running gear, unless the body was in a real bad state.
Sorry, the panel between the rear lights is long gone. But I think I still have the wing mirrors and the head lights if i’m not mistaken.
My Sierra saloon

Re: My Sierra saloon
After having driven the 12v for 50.000 km I kind of got used to the power. On top of that it didn't really run that well on LPG, low MPG and high CO, so I decided to fit something else.
First removing the exhaust and prop again and then disconnected all hoses and wiring. After that a friend came to give me a hand and we took the brakes off.
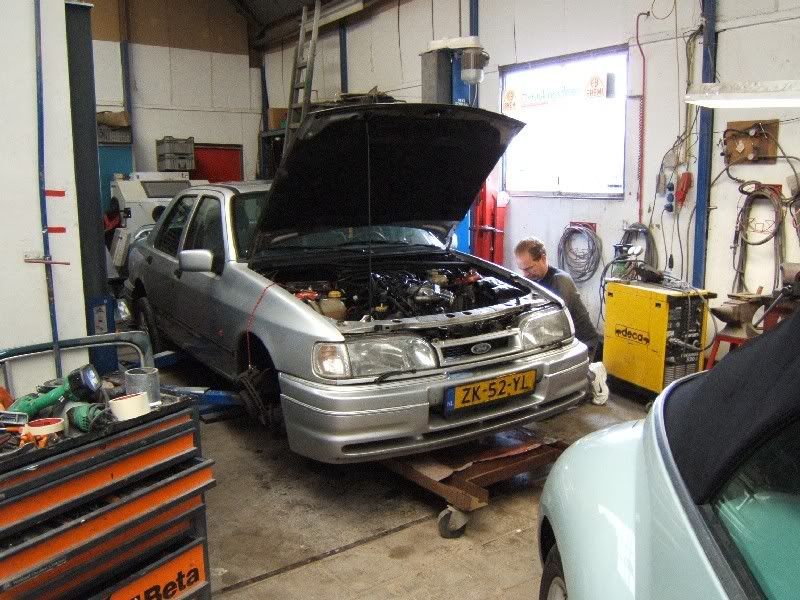
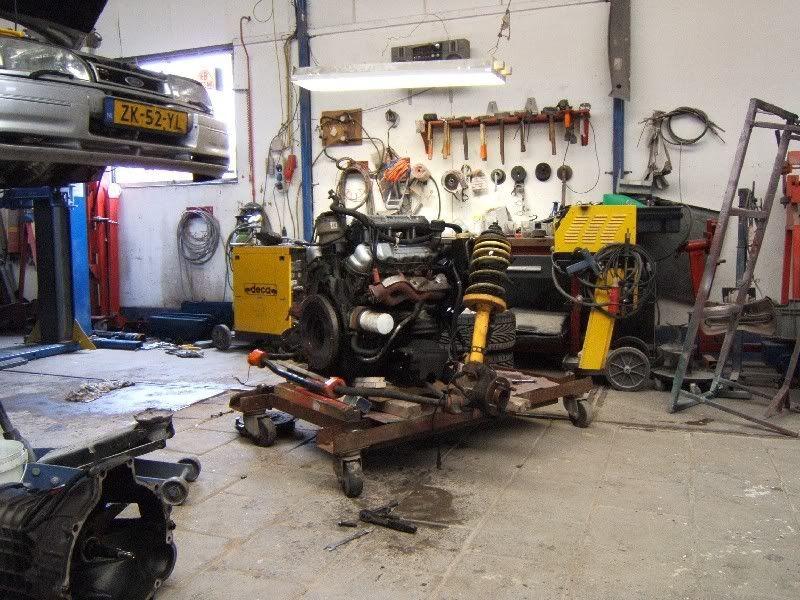
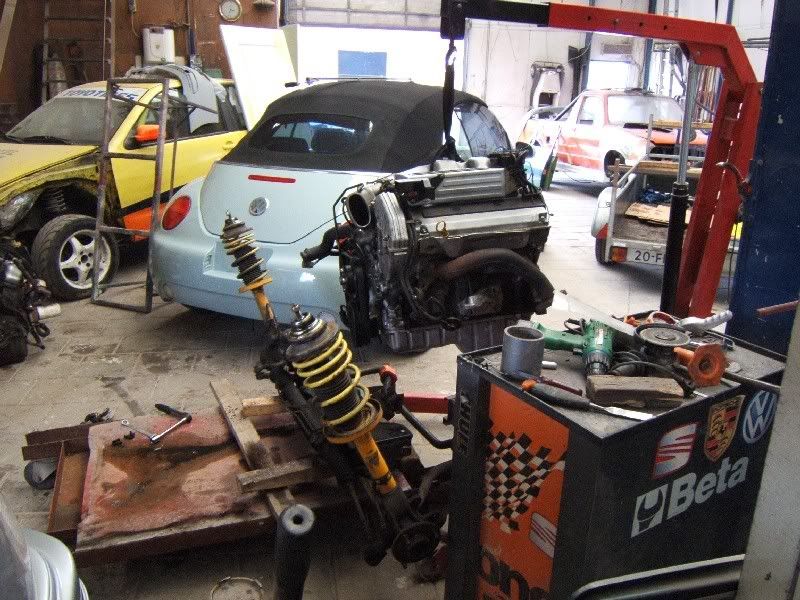
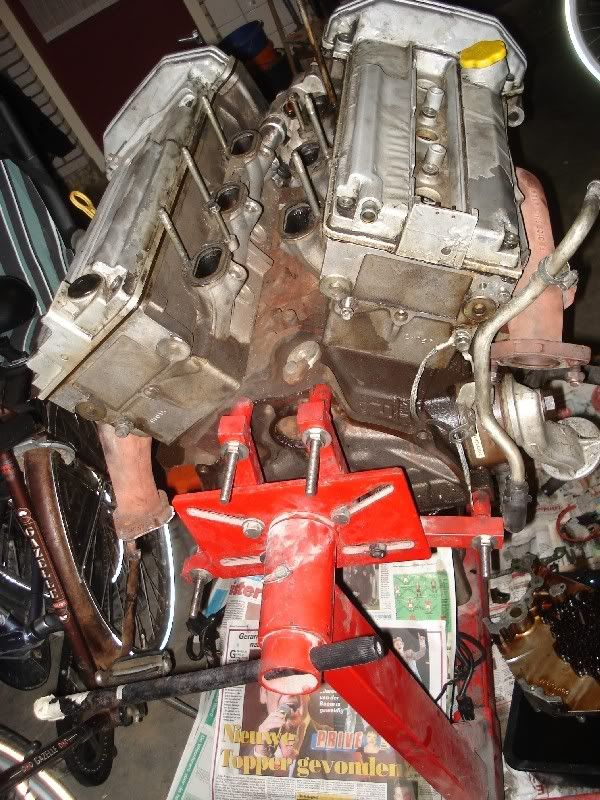
Then it was time to remove the engine (again).
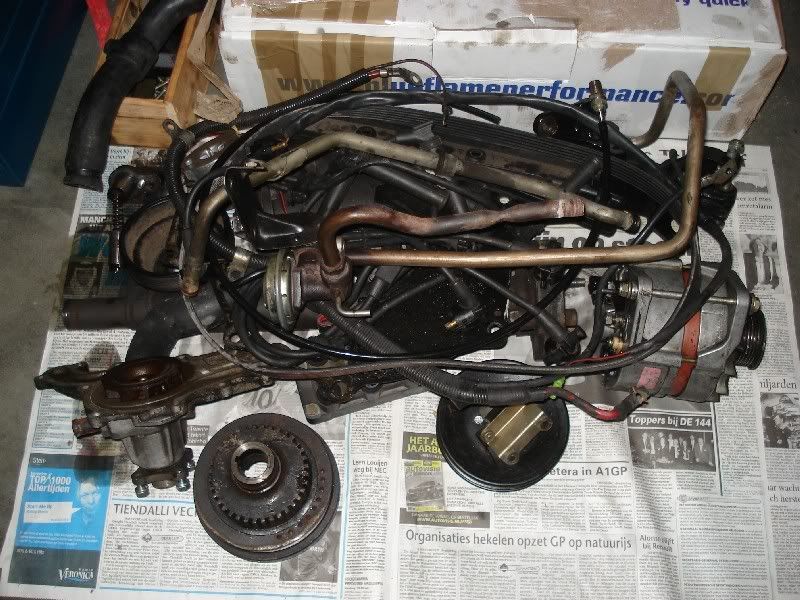
The 12v with the box and clutch removed.
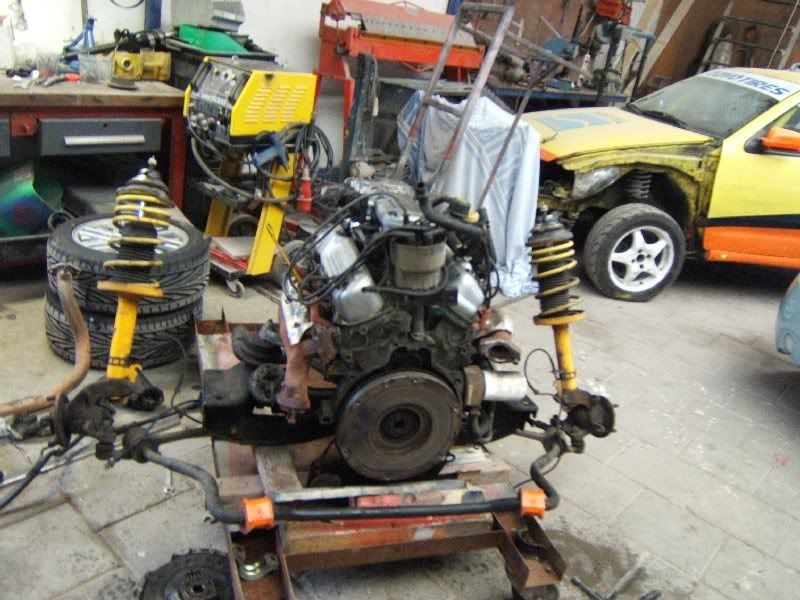
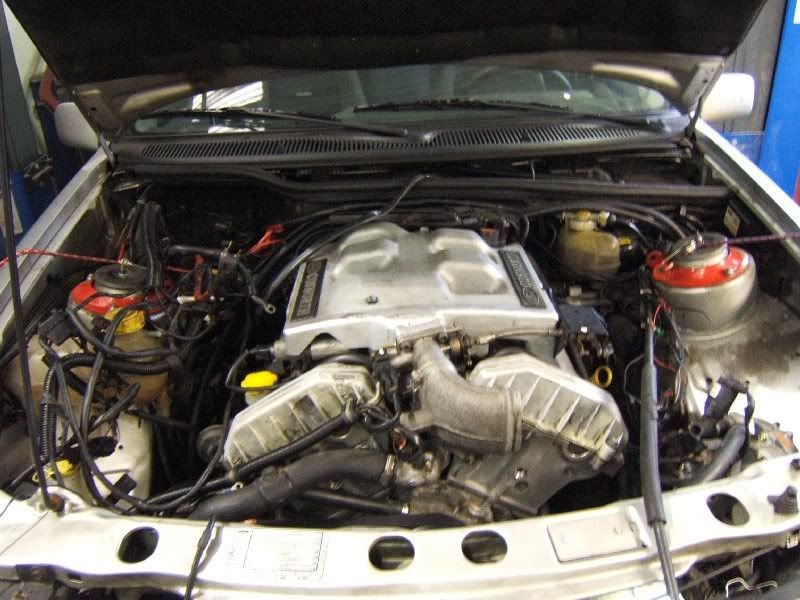
Time to get the new engine ready.
24v BOA on the engine hoist
Putting it on the engine subframe.
Then fitted the 12v flywheel and a new clutch kit to the engine.
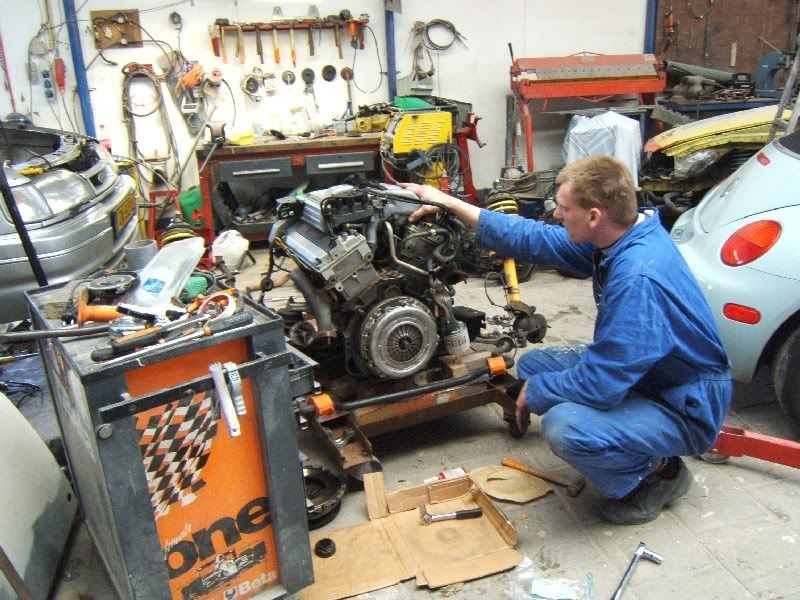
And the box back on.
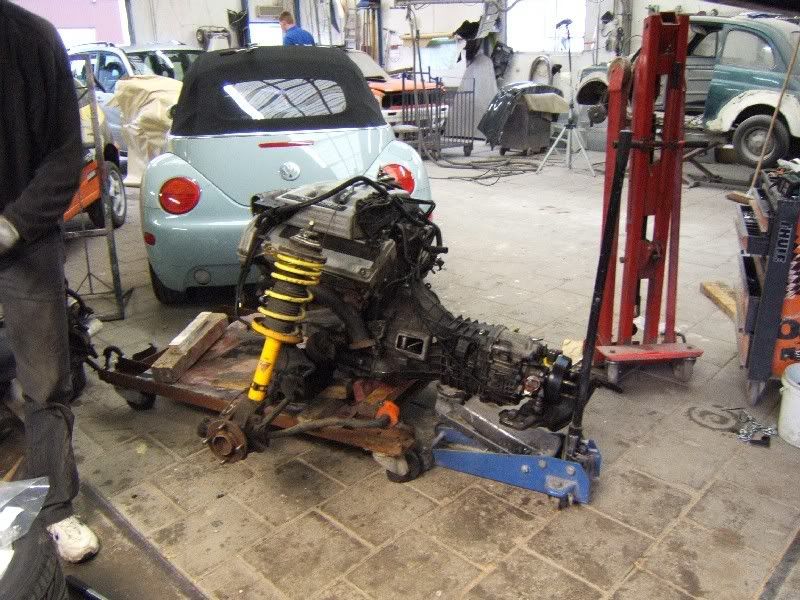
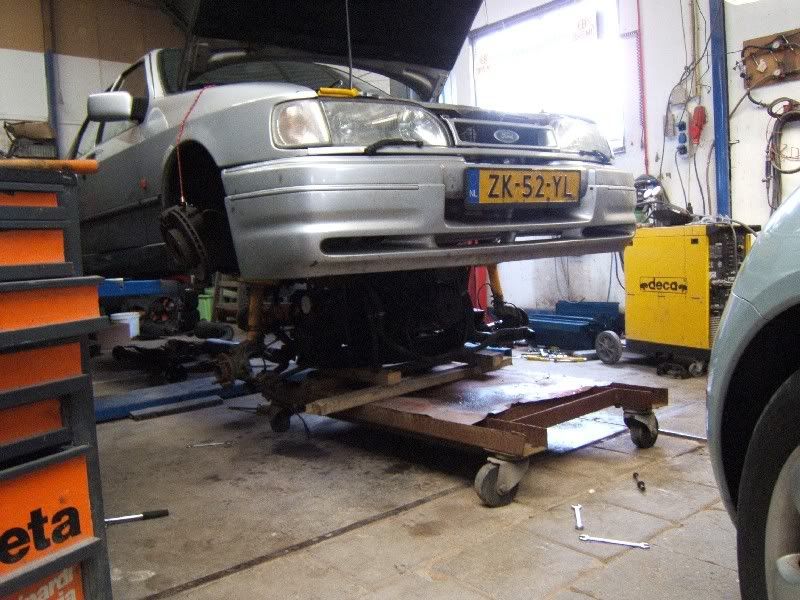
And lowered the car over the engine and box to position them correctly.
Then it was time to mount the subframe, gearbox mount, arb and struts.
Still had some time to fit the radiator with the electric fans and some cooling hoses. But at 21.30 I called it a day, kind of exhausting when working from 9 am...
First removing the exhaust and prop again and then disconnected all hoses and wiring. After that a friend came to give me a hand and we took the brakes off.
Then it was time to remove the engine (again).
The 12v with the box and clutch removed.
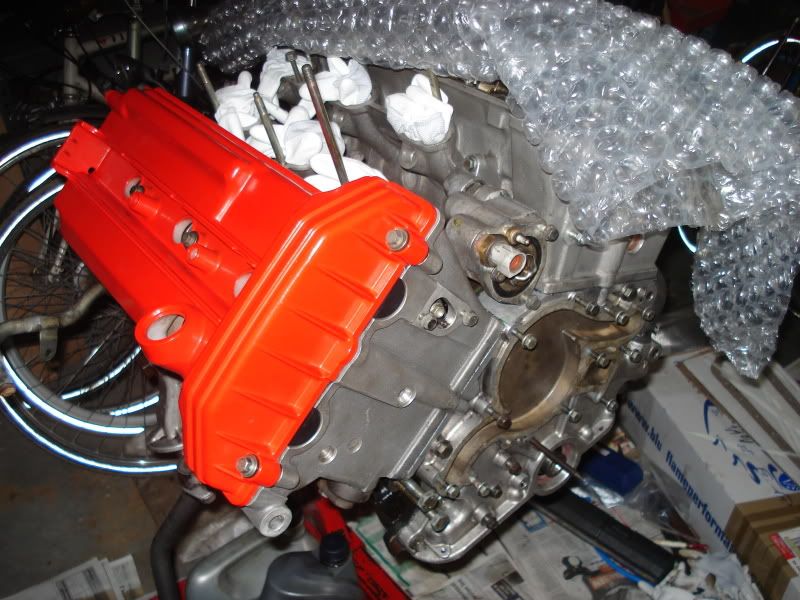
Time to get the new engine ready.
24v BOA on the engine hoist
Putting it on the engine subframe.
Then fitted the 12v flywheel and a new clutch kit to the engine.
And the box back on.
And lowered the car over the engine and box to position them correctly.
Then it was time to mount the subframe, gearbox mount, arb and struts.
Still had some time to fit the radiator with the electric fans and some cooling hoses. But at 21.30 I called it a day, kind of exhausting when working from 9 am...
Re: My Sierra saloon
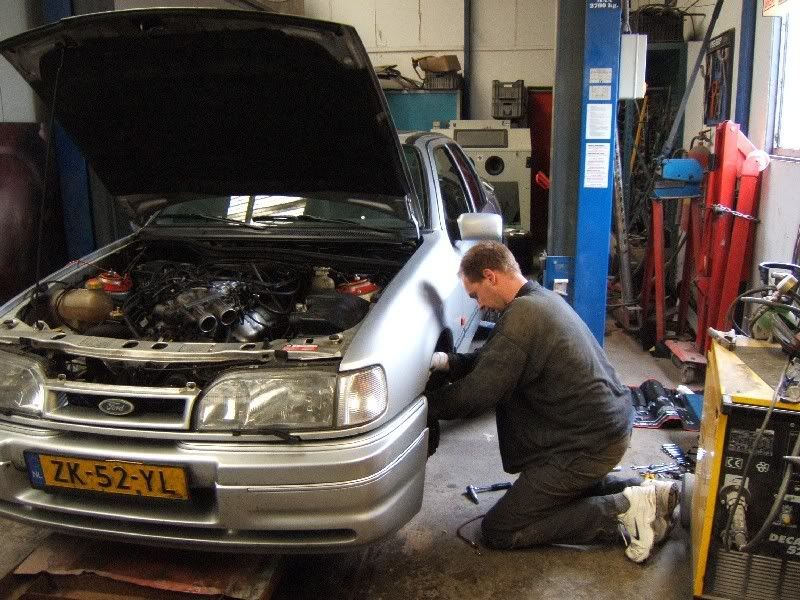
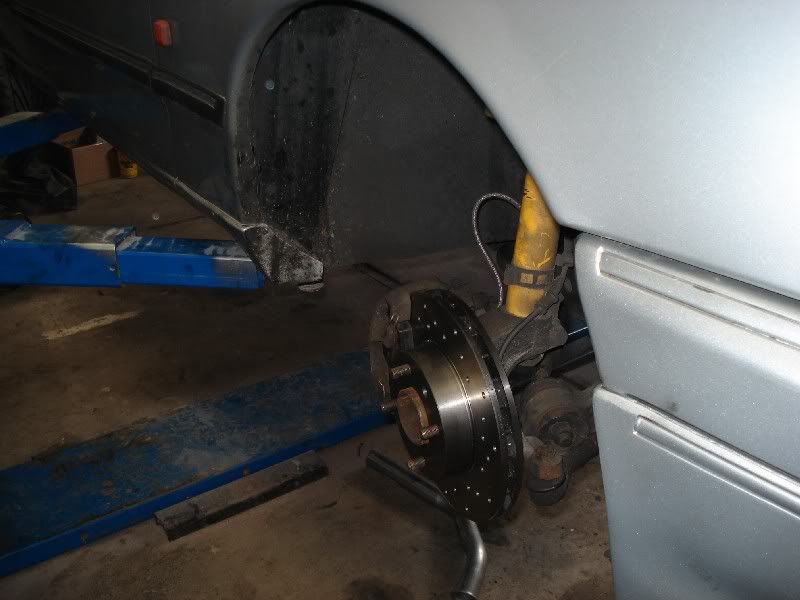
As the brakes were off and I still had to fit new discs and pads I put those on. Brembo discs with Ferodo DS2500 pads.

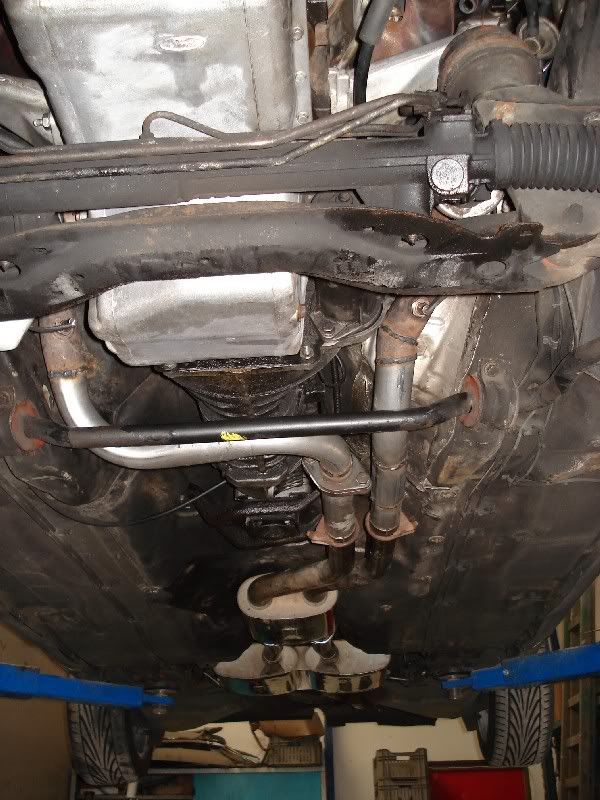
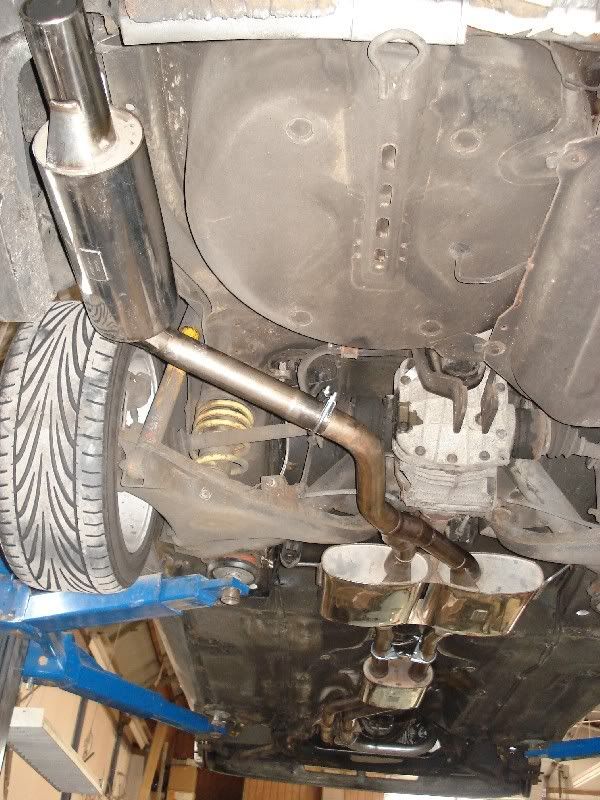
After that it was time to fit the exhaust. I got a complete stainless steel Magnex exhaust for an 2.9 XR4x4 off eBay.
First I fitted the centre and rear silencers so it was clear how the downpipes needed to be made.
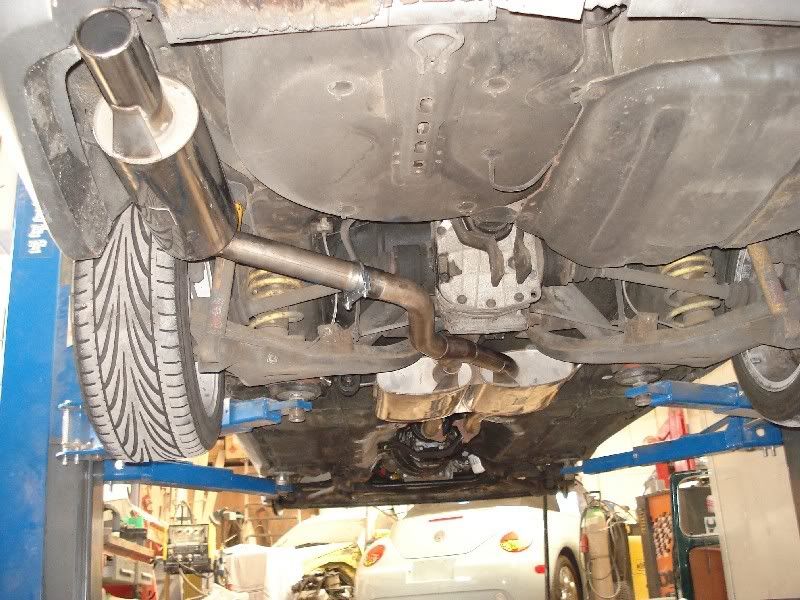
Together with the Magnex exhaust I got a new set of 2.9 12v downpipes so I could use those to make 24v downpipes that fit the Magnex system. Halfway the right downpipe I put an extra flange to be able to remove the exhaust more easily if needed.
Then I fitted all exhaust clamps and the exhaust was ready.
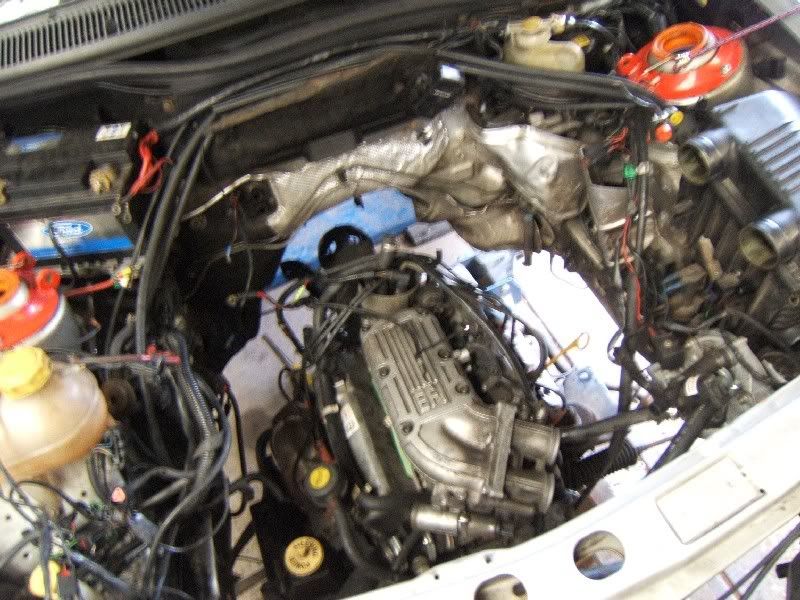
I also had to adapt the engine loom. I removed the tape from the part where the 3 connectors needed to be behind the battery.
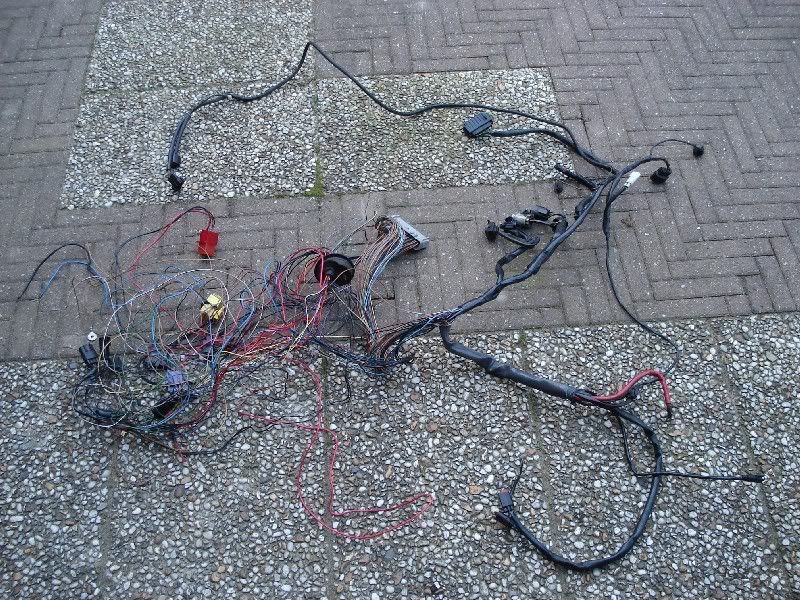
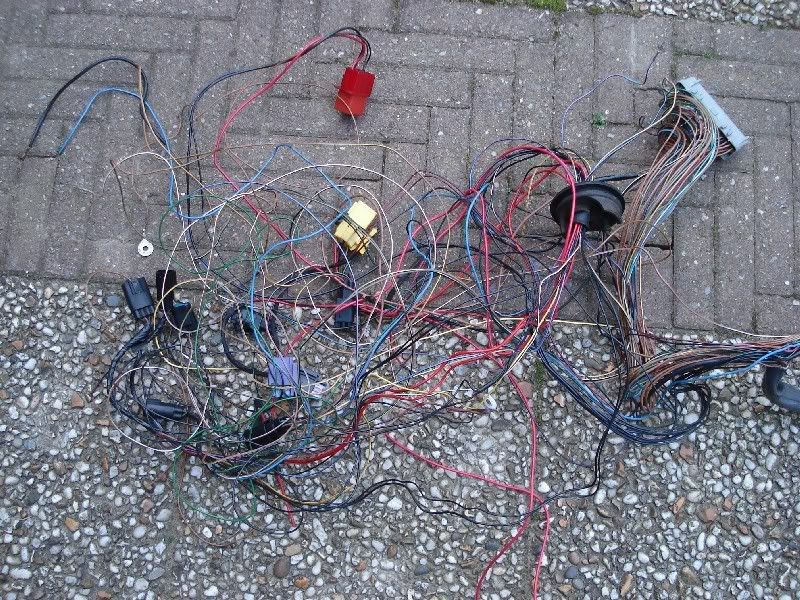
Afterwards I taped it back in so it looked like a standard Sierra 24v loom.
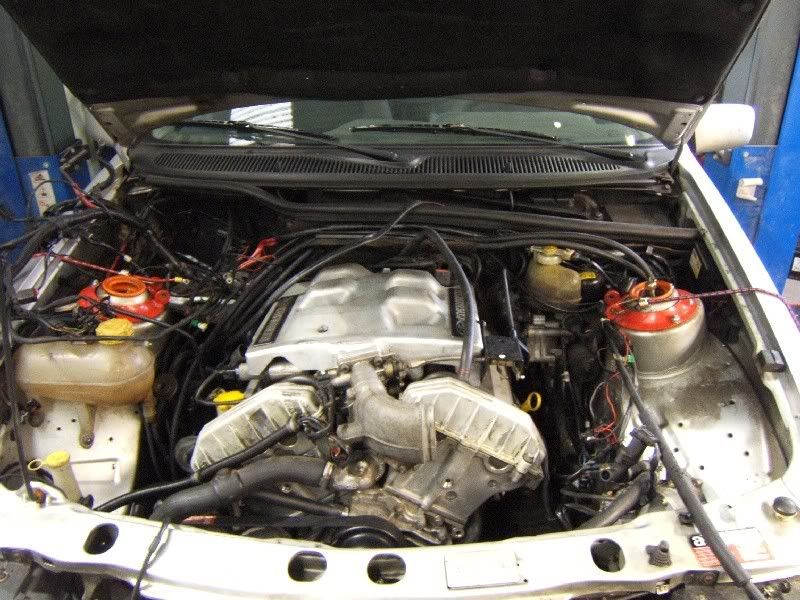
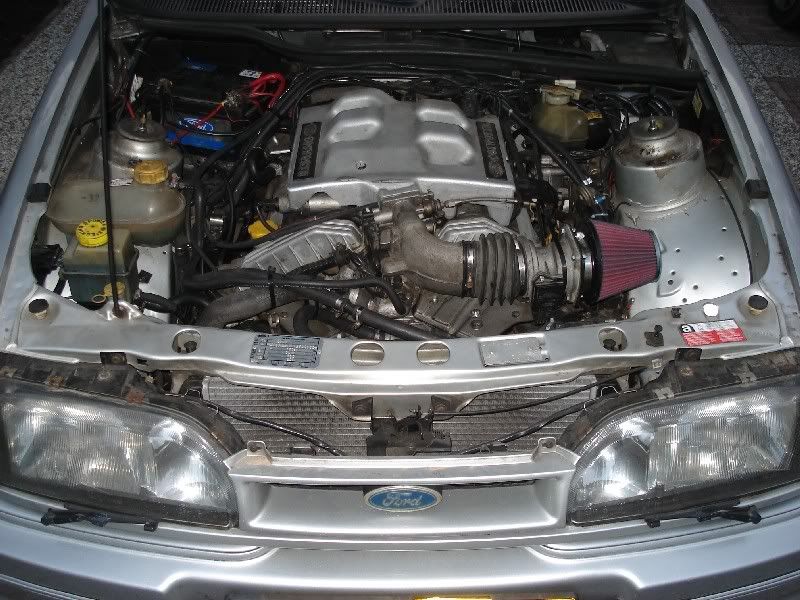
Swapped the 12v loom for the 24v loom and fitted the new K&N filter. 24v conversion finished.
After that it was time to fit the exhaust. I got a complete stainless steel Magnex exhaust for an 2.9 XR4x4 off eBay.
First I fitted the centre and rear silencers so it was clear how the downpipes needed to be made.
Together with the Magnex exhaust I got a new set of 2.9 12v downpipes so I could use those to make 24v downpipes that fit the Magnex system. Halfway the right downpipe I put an extra flange to be able to remove the exhaust more easily if needed.
Then I fitted all exhaust clamps and the exhaust was ready.
I also had to adapt the engine loom. I removed the tape from the part where the 3 connectors needed to be behind the battery.
Afterwards I taped it back in so it looked like a standard Sierra 24v loom.
Swapped the 12v loom for the 24v loom and fitted the new K&N filter. 24v conversion finished.

Re: My Sierra saloon
I'm assuming the headlights are different for RHD and LHD like the Sierras, so that won't help too much. Mine is black, so the OEM mirrors blend in fairly well. I still can't understand why the Scorpio didn't have the breakaway mirrors like my XR4Ti has.Marc wrote: ↑Mon Aug 06, 2018 2:30 pm Thanks! Seeing it now it’s indeed a shame of the Scorpio. This was actually back in 2007, so there were still quite some Scorpio’s around at that time. Nowadays I wouldn’t scrap a Scorpio anymore for its running gear, unless the body was in a real bad state.
Sorry, the panel between the rear lights is long gone. But I think I still have the wing mirrors and the head lights if i’m not mistaken.
If you come across a Scorpio smoked rear panel, keep me in mind.
David Reese
88 XR4Ti - mono white T5, someday to be bi wing
89 Scorpio - waiting on some parts before it hits the road again
88 XR4Ti - mono red C3, parts car
used to own 86 dark blue traded in on a min van, what was I thinking?
88 XR4Ti - mono white T5, someday to be bi wing
89 Scorpio - waiting on some parts before it hits the road again
88 XR4Ti - mono red C3, parts car
used to own 86 dark blue traded in on a min van, what was I thinking?
Re: My Sierra saloon
Yes headlights are different LHD and RHD. But in Holland they are LHD just like the US.
Re: My Sierra saloon
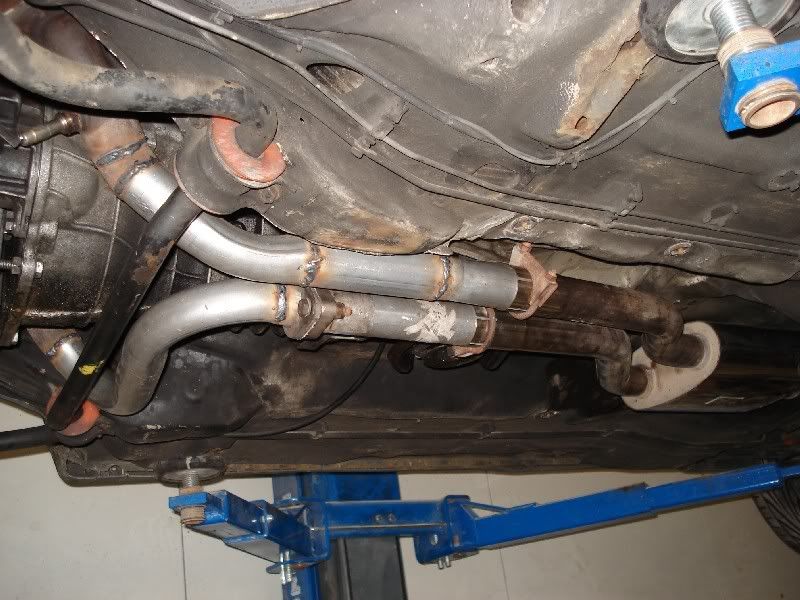
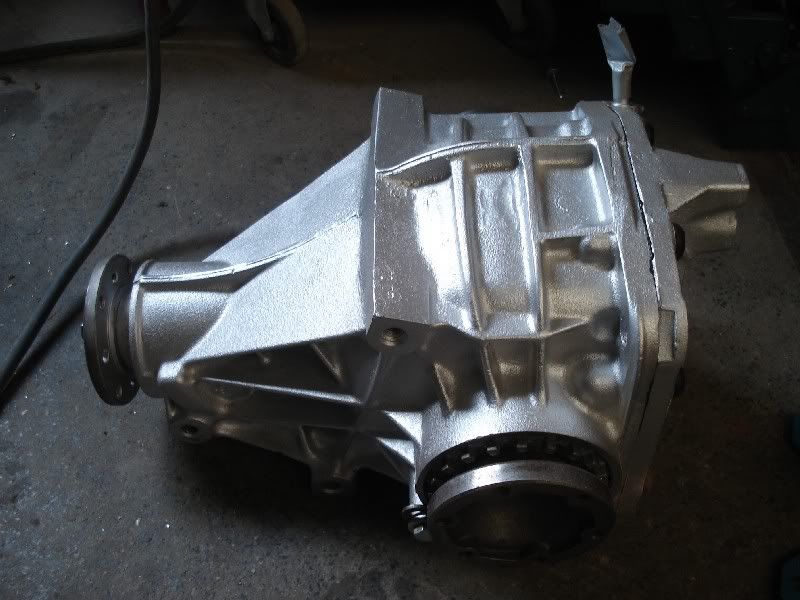
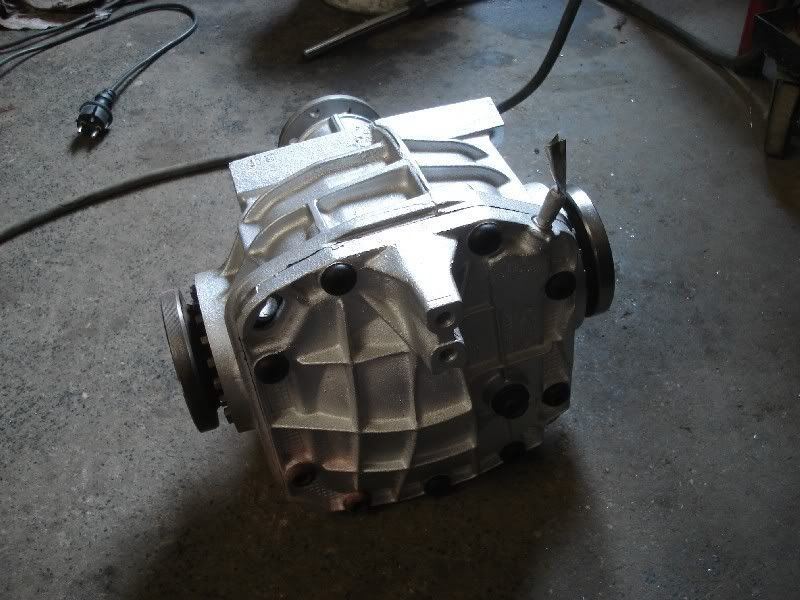
Since the 24v has quite a bit of torque and the 2wd Sierra 2.9 as standard should have a 3.36:1 diff I wanted to fit such a diff. Luckily I found one from a Scorpio 2.5 TD. But I wanted to retain the LSD, so I brought the differential to a guy to have a LSD part fitted to it. The guy also cleaned it and painted it. I must say it looks very nice.
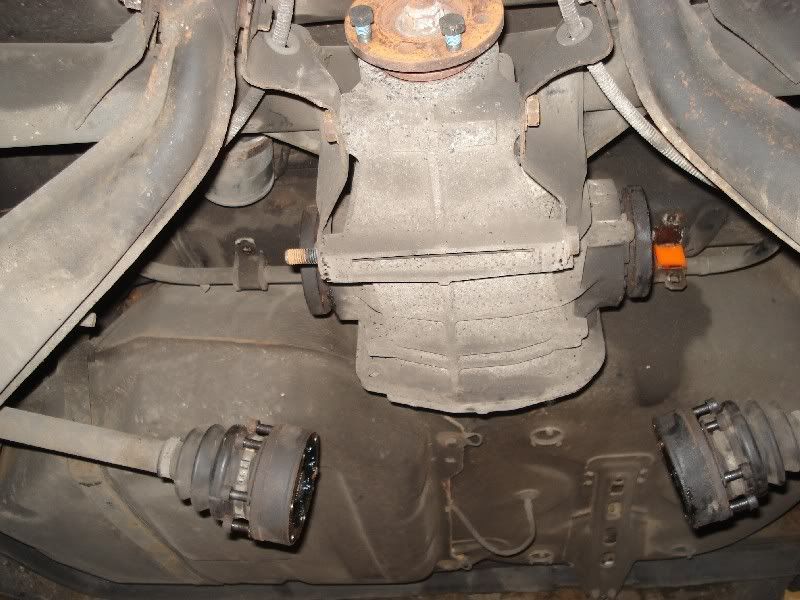
Tuesday I started taking the old diff out. Unfortunately some of the driveshaft bolts were very tight, so I broke one of my T45 Torx bits. Eventually they all out without damaging the bolt heads.
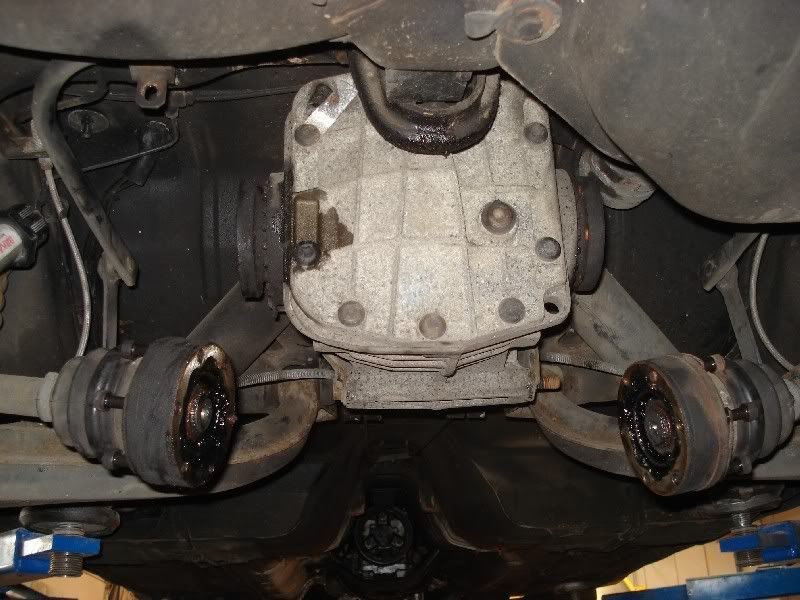
I also had a alloy diff mount from MC2Racing with a PU bush lying around for a while.
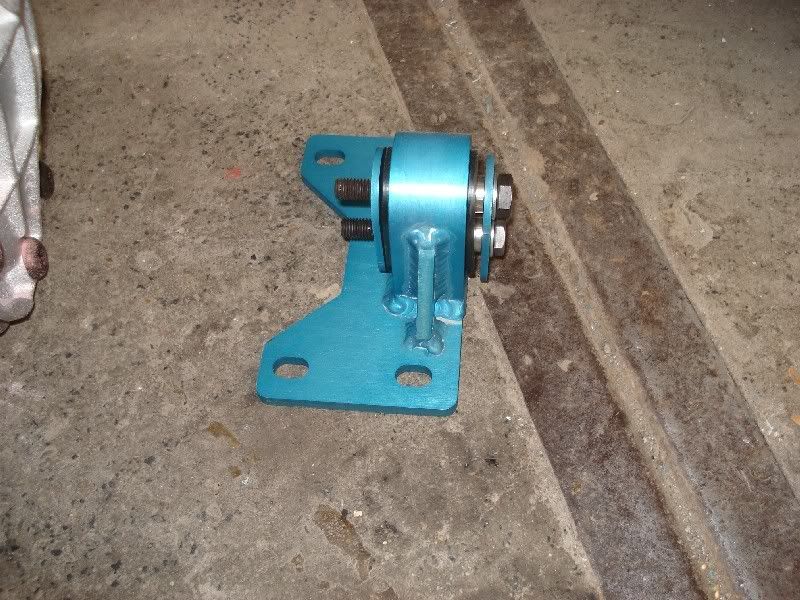
So with fitting the 3.36:1 LSD I also fitted the new diff mount. The diff mount isn't a really nice fit. I had to take out one of the plates and the washer on the top bolt, but still the top bolt hit the arb. In the end I got a "flush fit" kit for it.

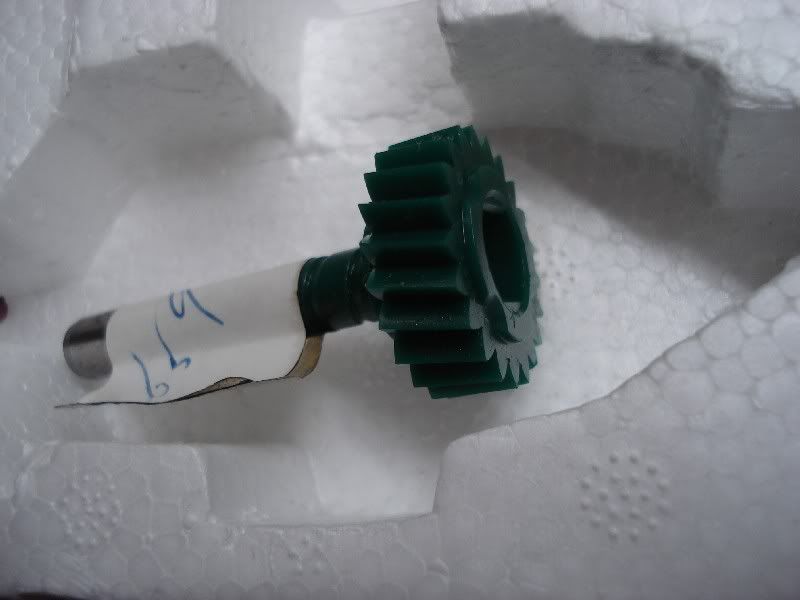
In order to make the speedo read correctly, I had to change the speedo cog. With the 3.64 diff I had a 23 teeth blue cog in the gearbox. Since 22 teeth is the lowest number of teeth according to MC I fitted that one to the box.
But after driving it I found out the speedo is underreading, so I had another look in MC and it turns out that there is 21 teeth cog for the Scorpio, so I ordered that one.
Tuesday I started taking the old diff out. Unfortunately some of the driveshaft bolts were very tight, so I broke one of my T45 Torx bits. Eventually they all out without damaging the bolt heads.
I also had a alloy diff mount from MC2Racing with a PU bush lying around for a while.
So with fitting the 3.36:1 LSD I also fitted the new diff mount. The diff mount isn't a really nice fit. I had to take out one of the plates and the washer on the top bolt, but still the top bolt hit the arb. In the end I got a "flush fit" kit for it.
In order to make the speedo read correctly, I had to change the speedo cog. With the 3.64 diff I had a 23 teeth blue cog in the gearbox. Since 22 teeth is the lowest number of teeth according to MC I fitted that one to the box.
But after driving it I found out the speedo is underreading, so I had another look in MC and it turns out that there is 21 teeth cog for the Scorpio, so I ordered that one.
-
John Brennan

- Level 8
- Posts: 11630
- Joined: Wed Jun 18, 2003 4:19 pm
- Location: Scottsdale, AZ "Summer Is Coming"
Re: My Sierra saloon
- 20170225_175321.jpg (1.39 MiB) Viewed 9958 times
This is my car, and these are my people!
2015 Fiesta ST
2020 Edge 2.0 Ecoboost
2015 Fiesta ST
2020 Edge 2.0 Ecoboost
Re: My Sierra saloon
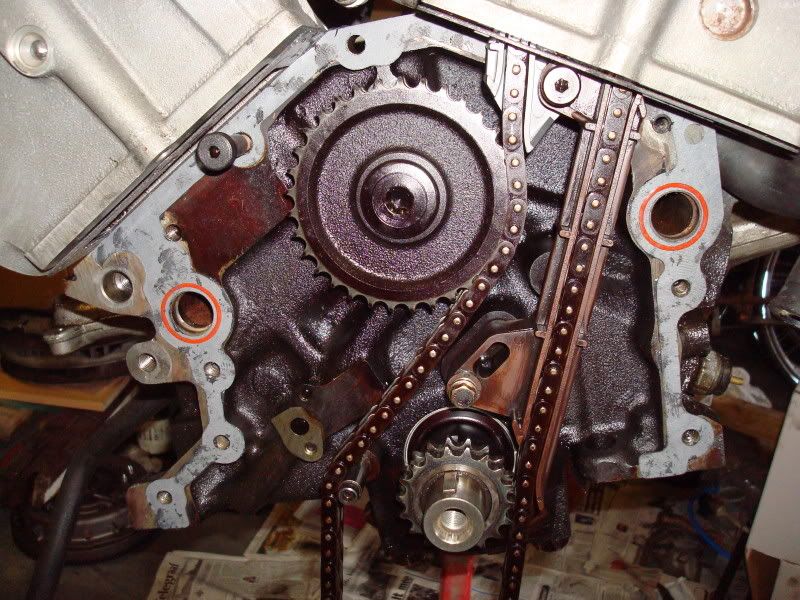
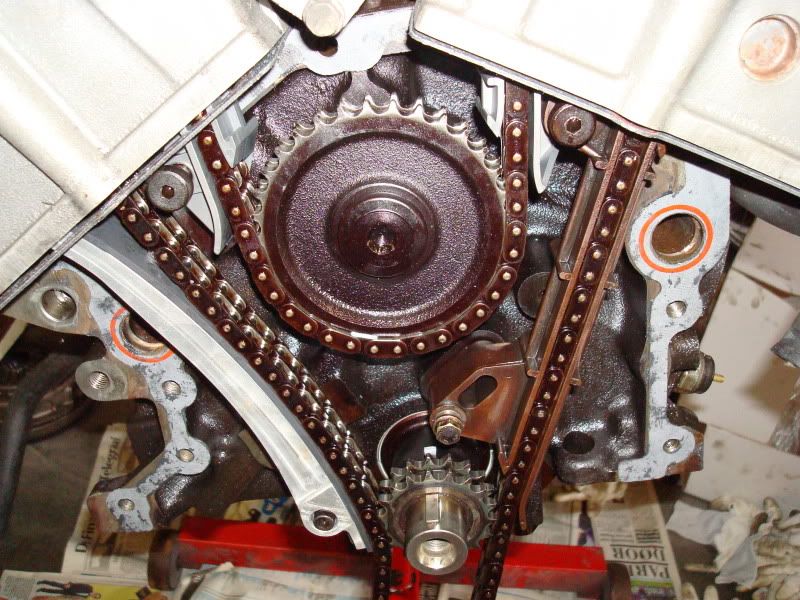
After driving the 24v for a while things went very wrong unfortunately.  The hydraulic chain tensioner started leaking oil. I suppose because of this the chain was not fully tensioned and "hitting" the chain guides. The guides broke and the chain jumped a few teeth on the cam sprockets.
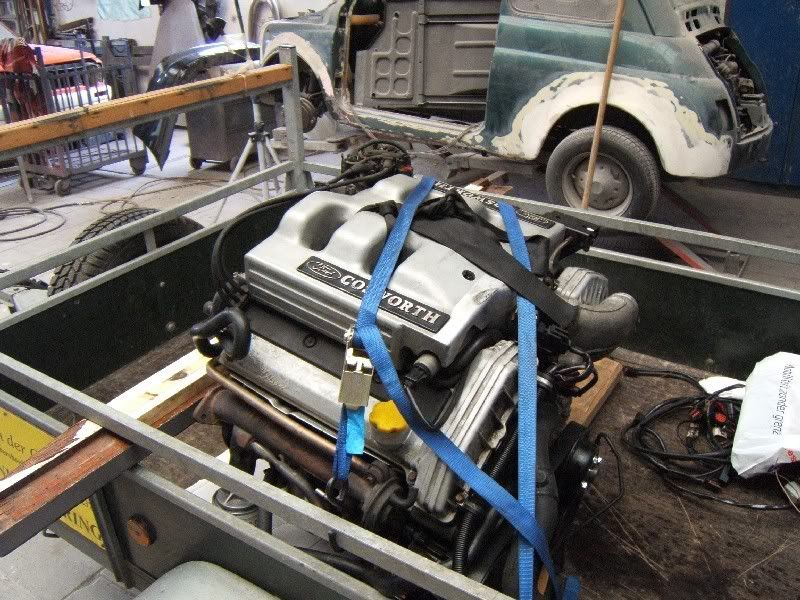
So it was time to get the engine out and on an engine stand.
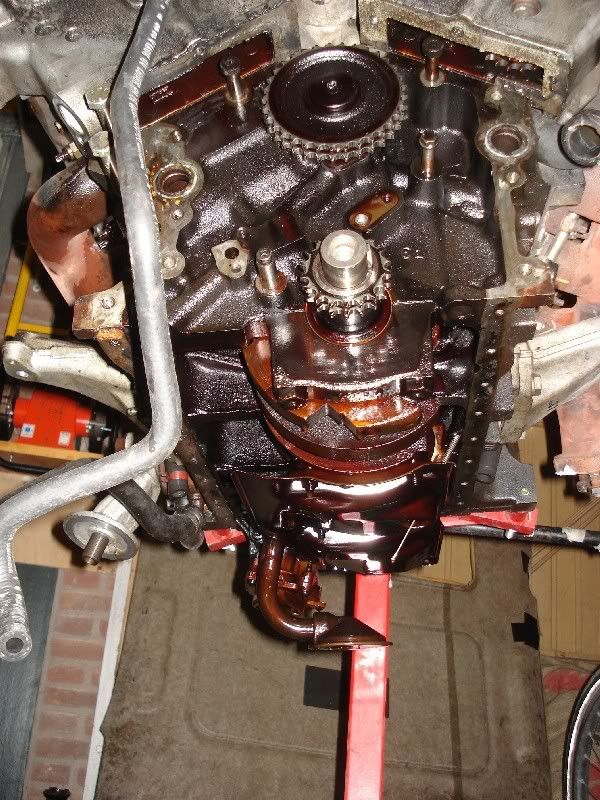
Took some parts off...
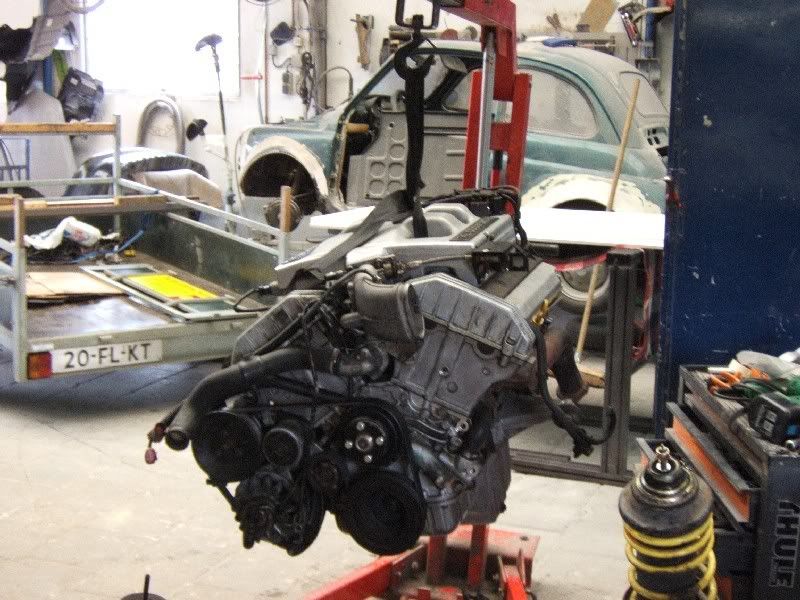
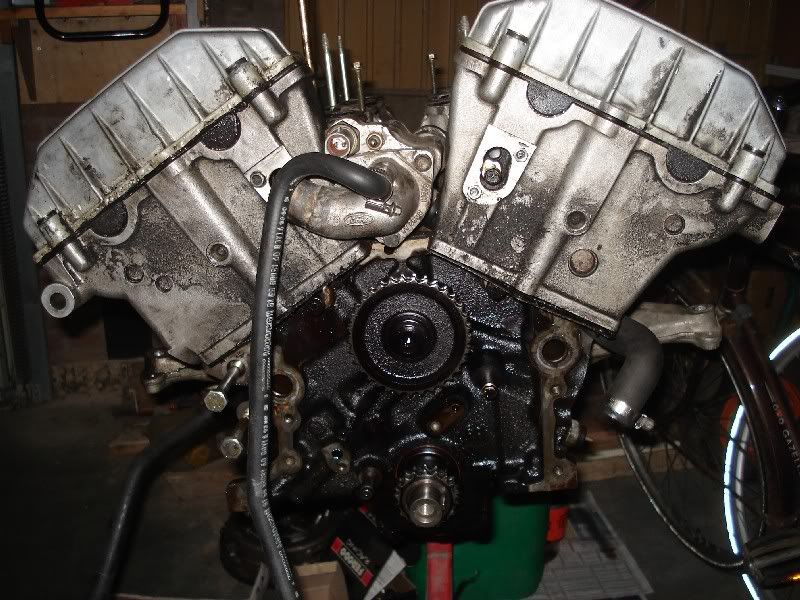
Making the block look a bit more naked..
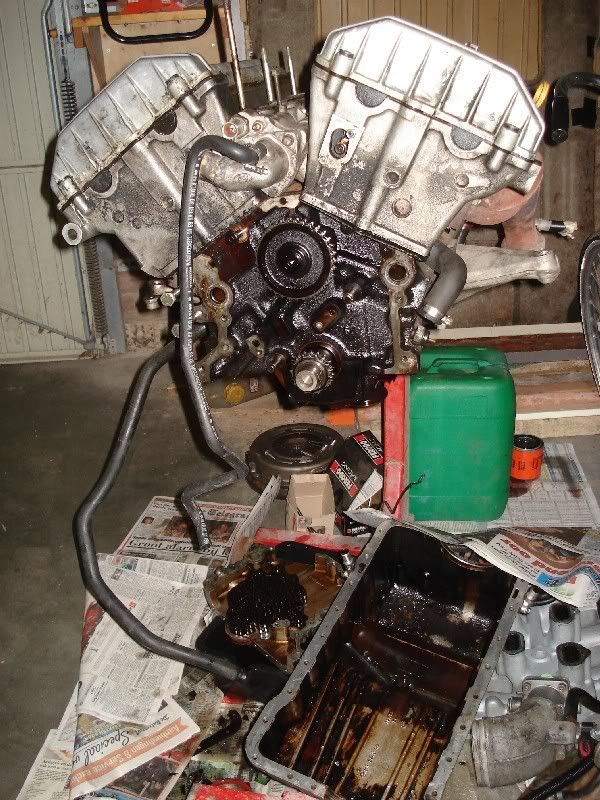
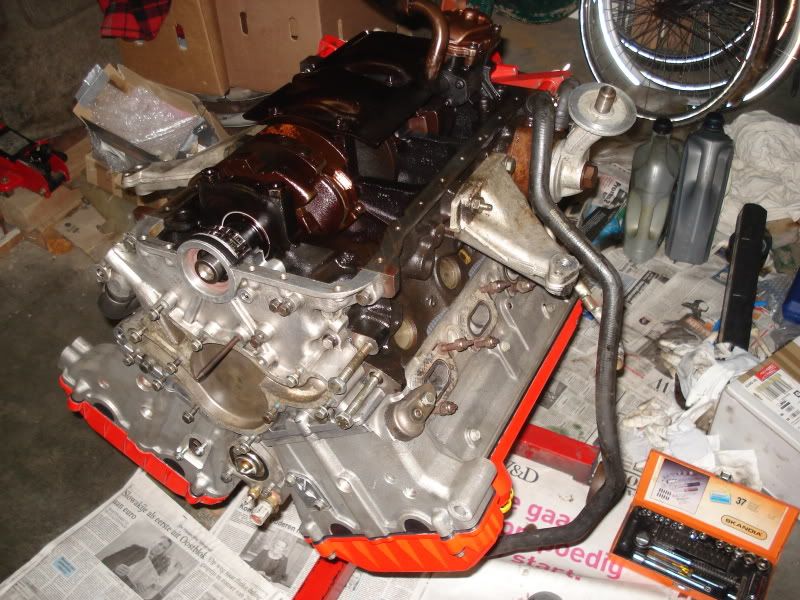
The engine from underneath with the sump taken off.
The two chain guides at the bottom were still there, although the plastic guide had cracked. All other guides were "missing". I found them in the sump in pieces...
So it was time to get the engine out and on an engine stand.
Took some parts off...
Making the block look a bit more naked..
The engine from underneath with the sump taken off.
The two chain guides at the bottom were still there, although the plastic guide had cracked. All other guides were "missing". I found them in the sump in pieces...
Re: My Sierra saloon
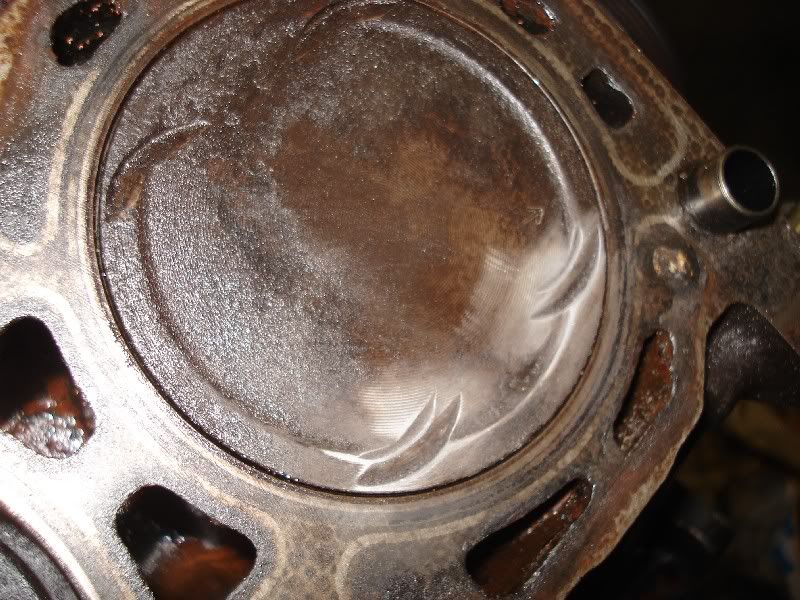
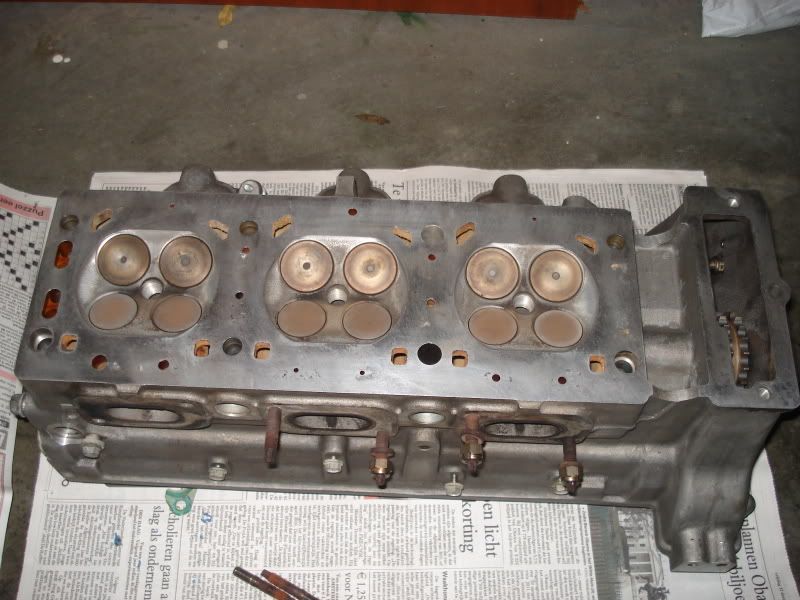
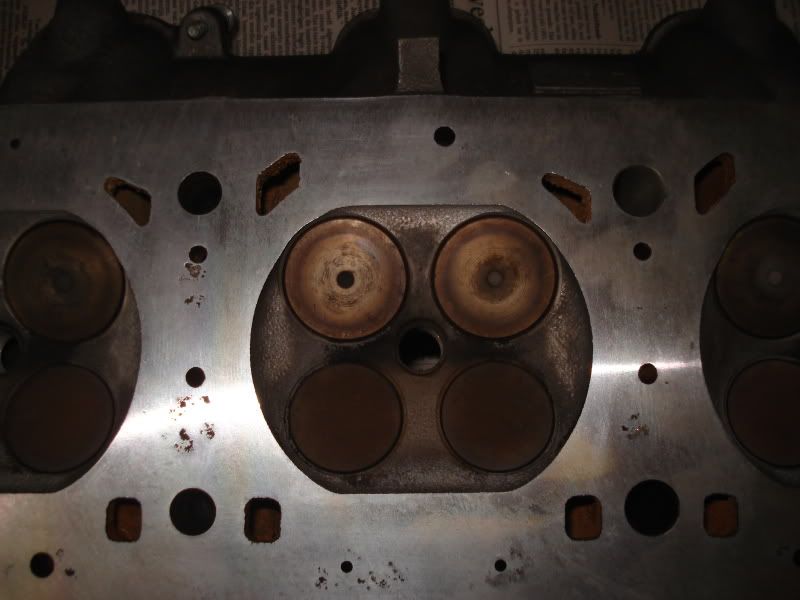
I took both cylinder heads off and it turned out that piston 1, 2 and 3 all had marks from the exhaust valves.
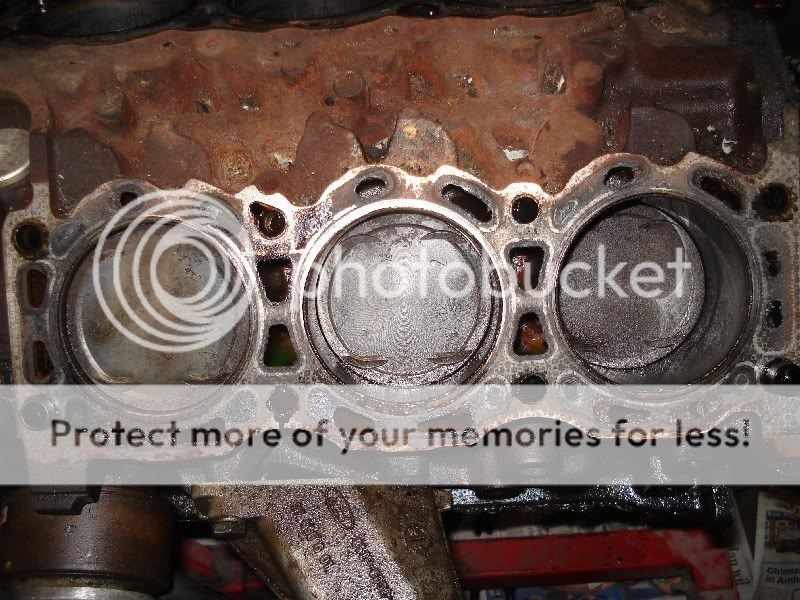
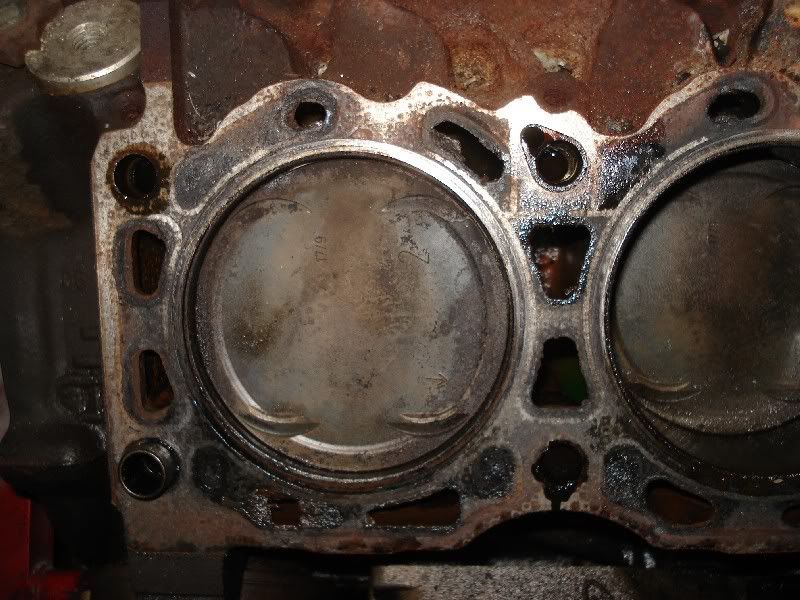
Luckily not all valves were bent, only those on cilinder 1.
I removed the sharp edges where the valves hit the pistons to avoid it might start detonating there.
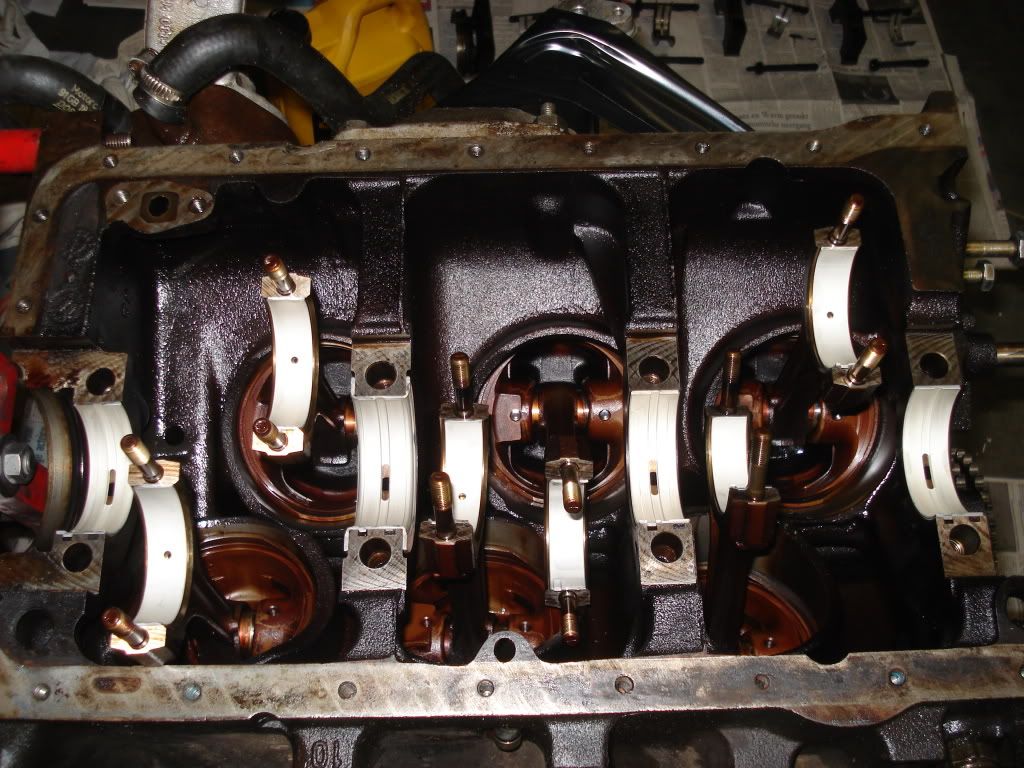
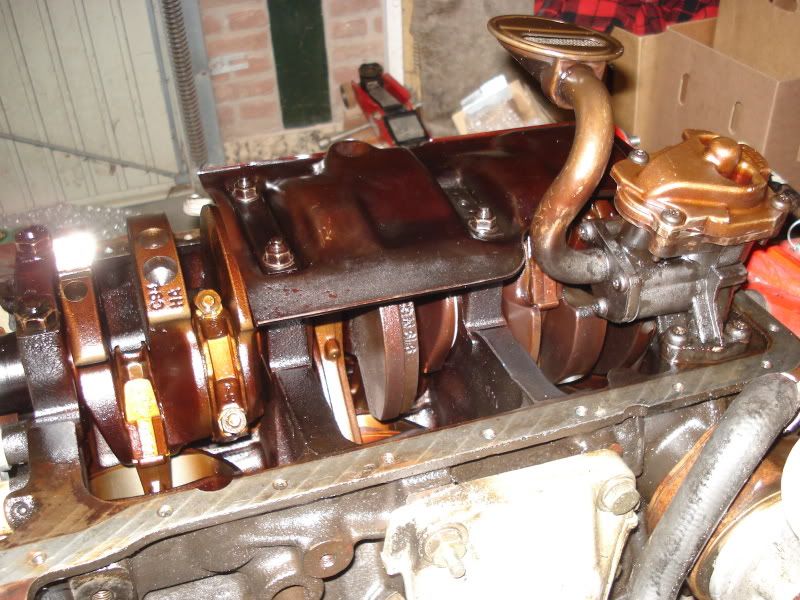
Took the oil pump off so the crank could come out.
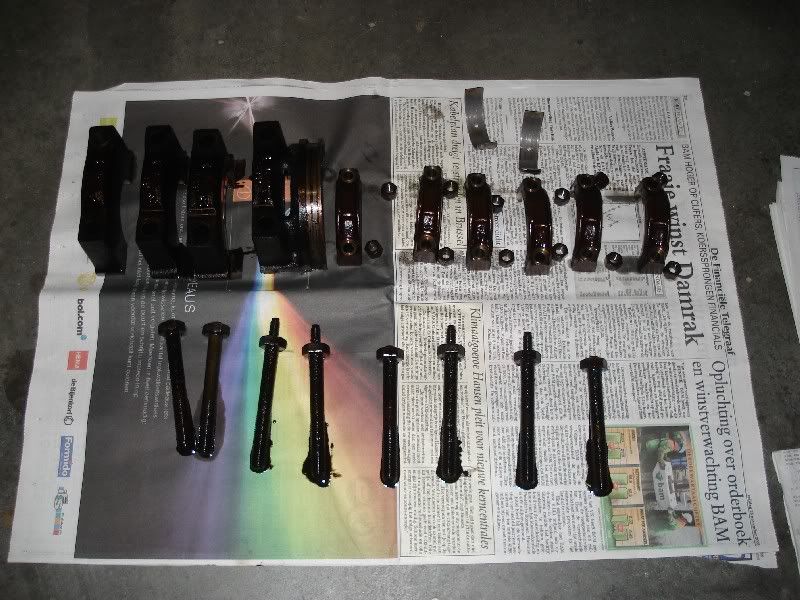
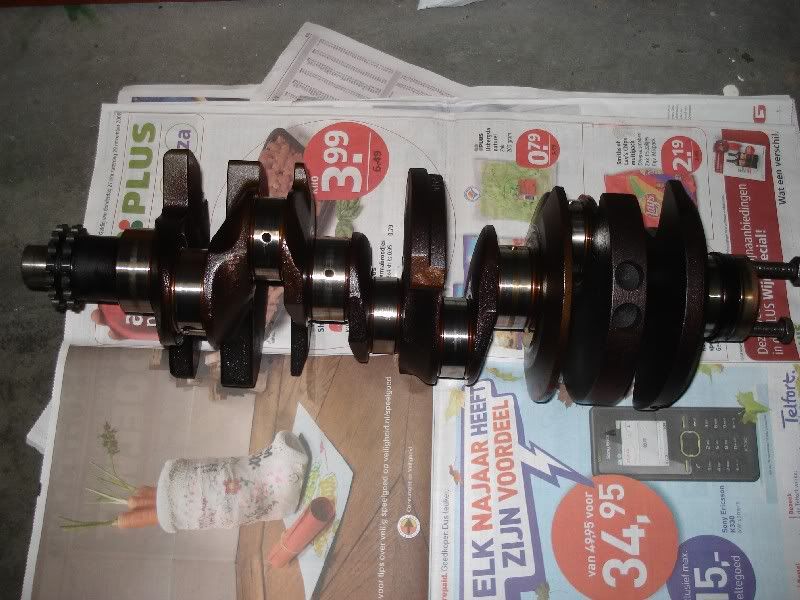
And replaced the main bearings and big end bearings.
Luckily not all valves were bent, only those on cilinder 1.
I removed the sharp edges where the valves hit the pistons to avoid it might start detonating there.
Took the oil pump off so the crank could come out.
And replaced the main bearings and big end bearings.
Re: My Sierra saloon
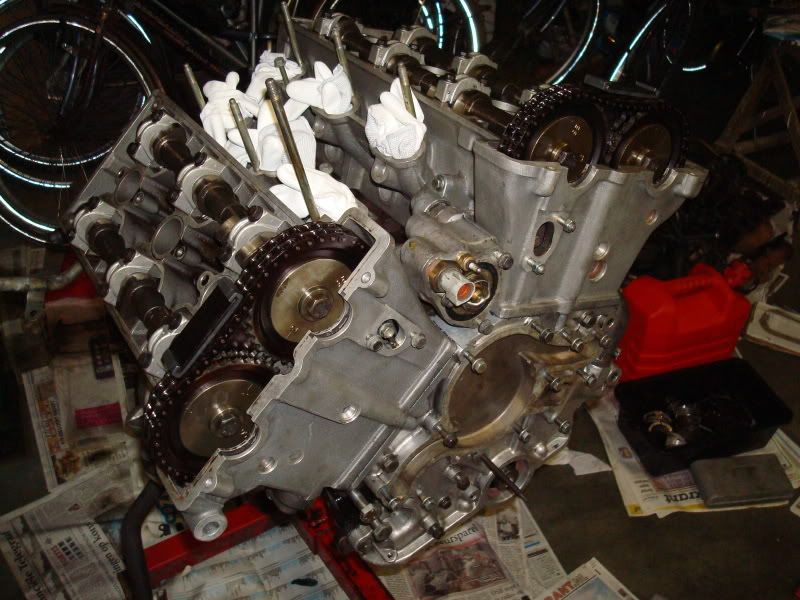
I had both heads skimmed slightly, the 2 bent valves replaced and all valves lapped in.
So the left head could be refitted and also the head gasket for the right head.
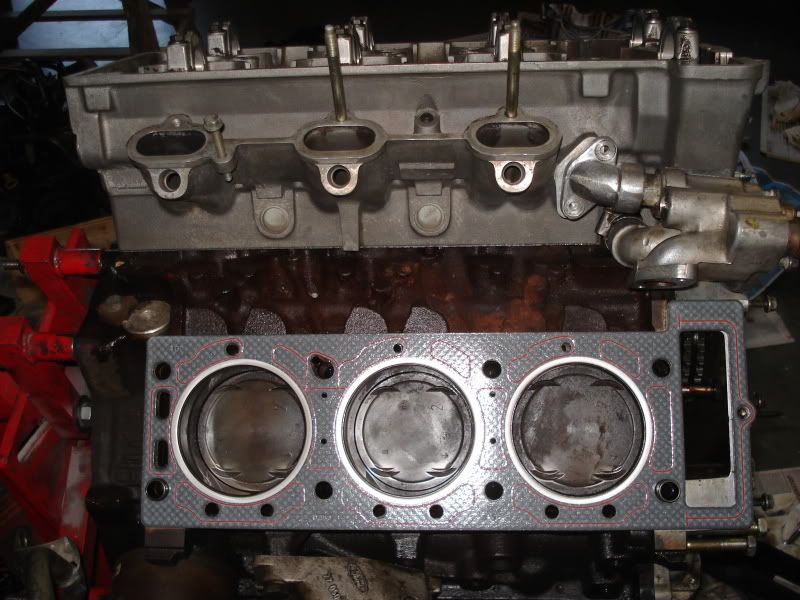
And the right cylinder head also fitted...
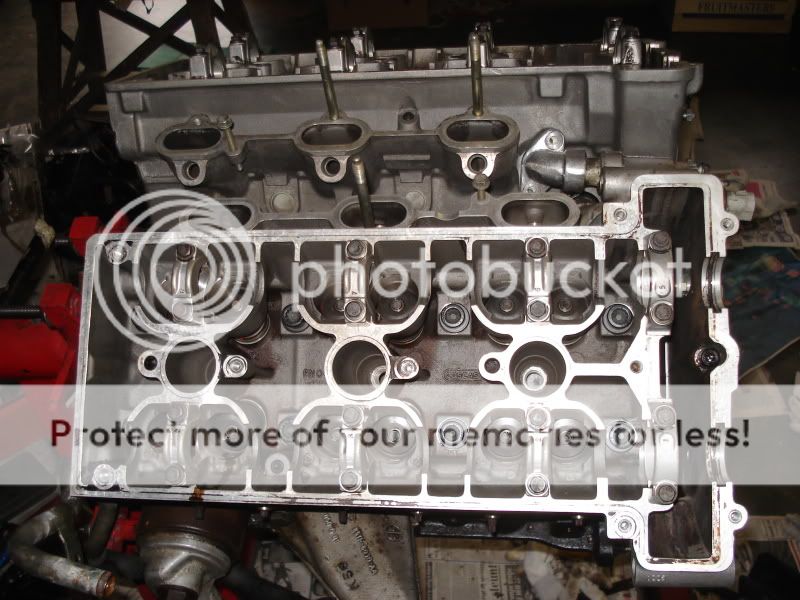
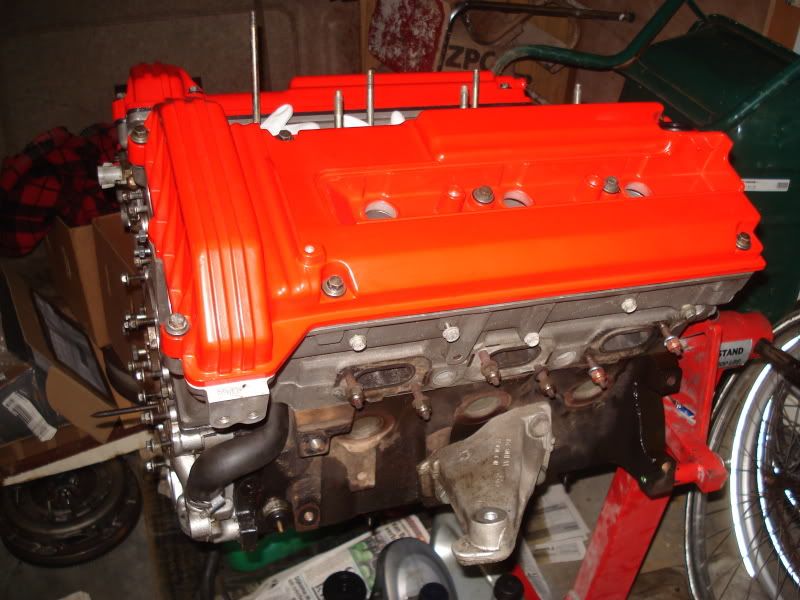
Put all the tappets back in, the inlet cam (got some BOB cams to fit right away ) of the left head, together with the chain and chain guides on the left side.
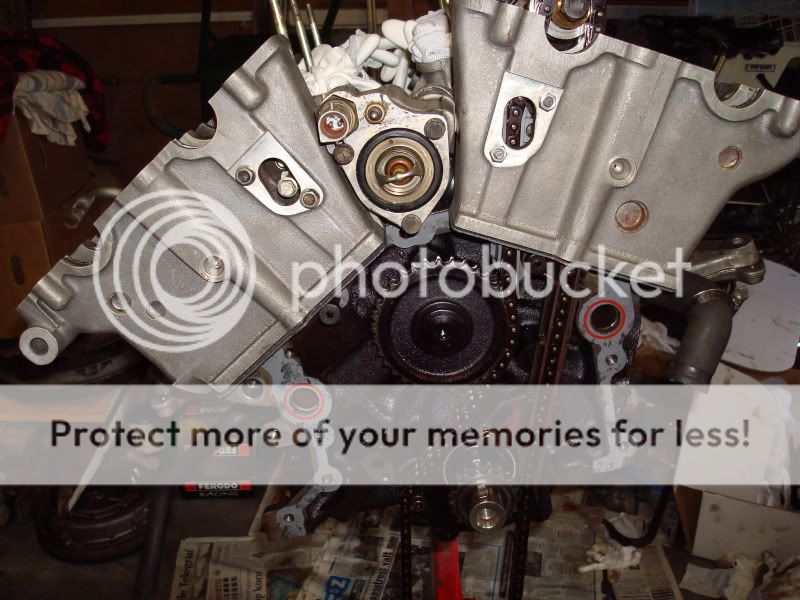
And the inlet cam and guides on the right side fitted.
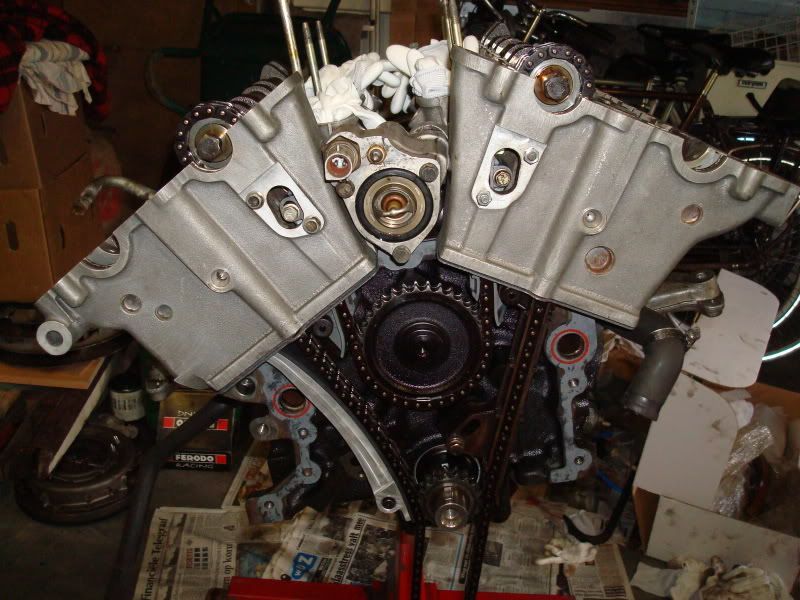
Fitted the exhaust cams and the left side sprockets.
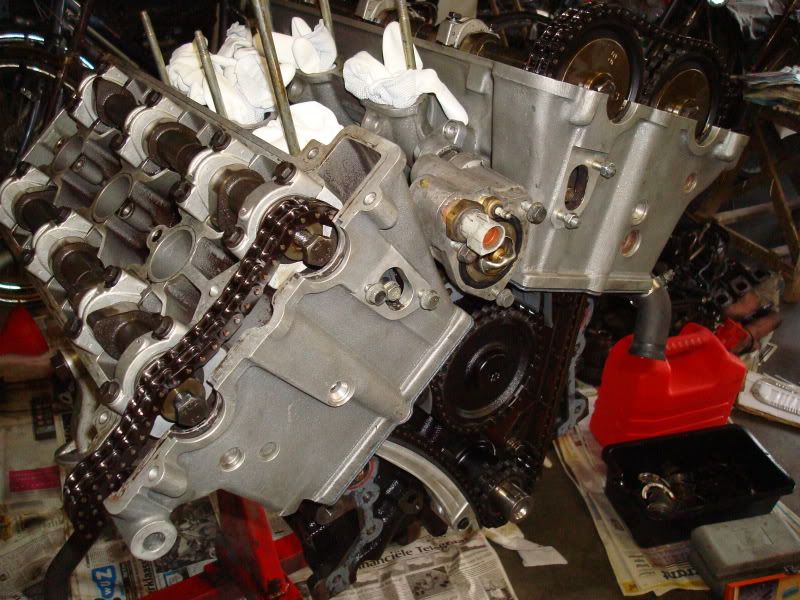
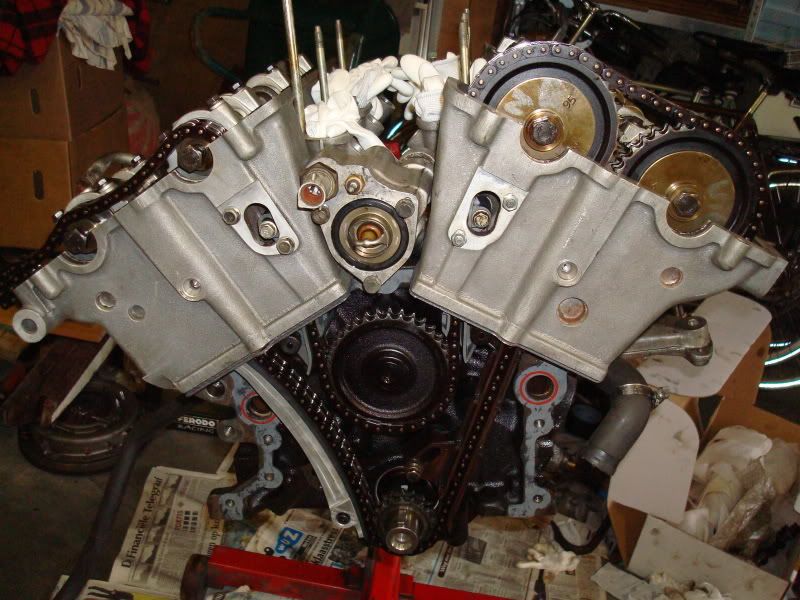
And the right side sprockets and lining it all up.
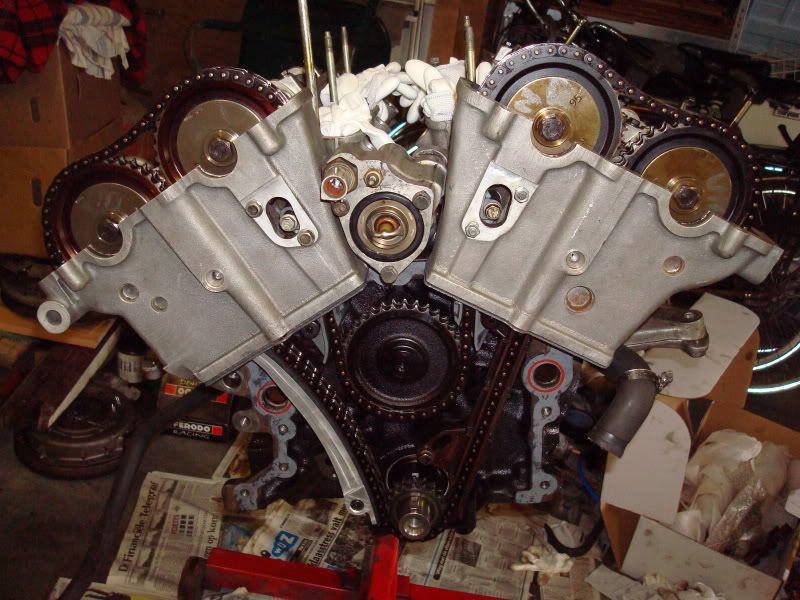
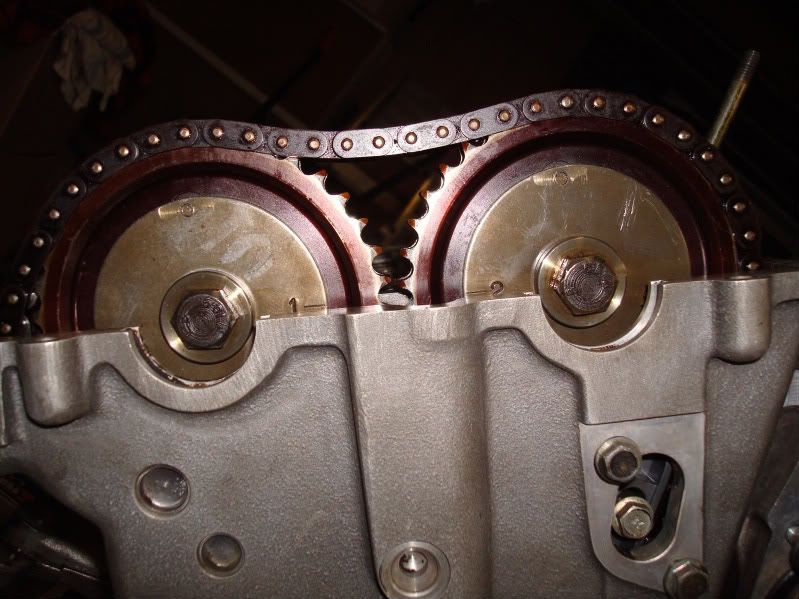

Put the chain tensioner in so the chain is straight between the sprockets, to verify the timing. I noticed the slack in the chain will easily cause the chain to be 1 tooth out when it's not tensioned.
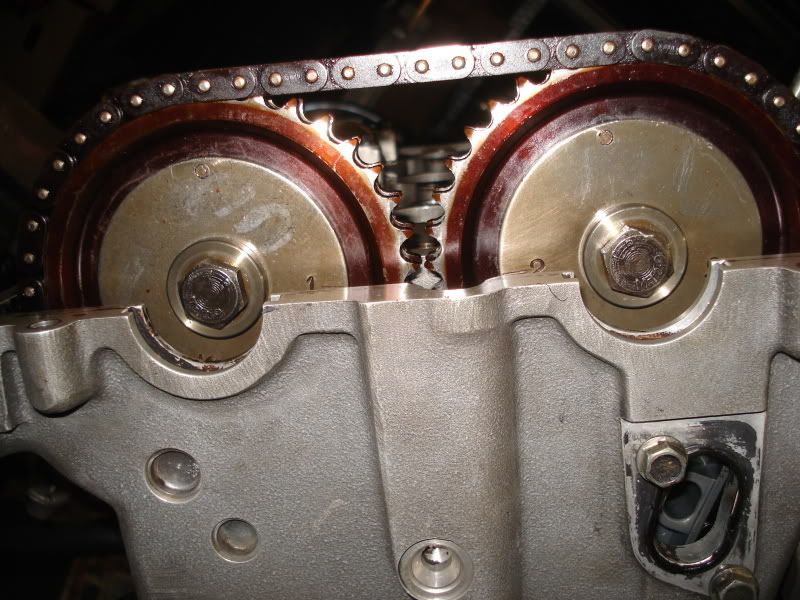
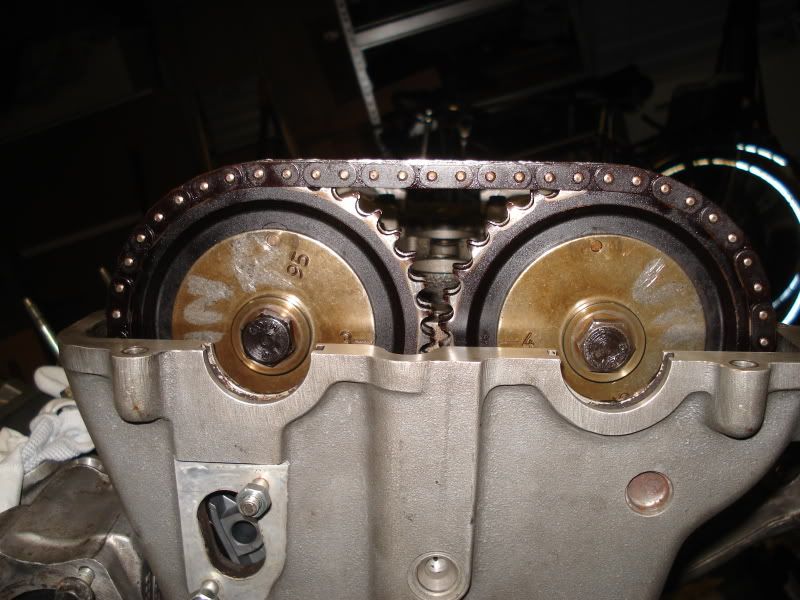
Put the timing cover back on and also the top chain guides.
So the left head could be refitted and also the head gasket for the right head.
And the right cylinder head also fitted...
Put all the tappets back in, the inlet cam (got some BOB cams to fit right away
And the inlet cam and guides on the right side fitted.
Fitted the exhaust cams and the left side sprockets.
And the right side sprockets and lining it all up.
Put the chain tensioner in so the chain is straight between the sprockets, to verify the timing. I noticed the slack in the chain will easily cause the chain to be 1 tooth out when it's not tensioned.
Put the timing cover back on and also the top chain guides.
Re: My Sierra saloon
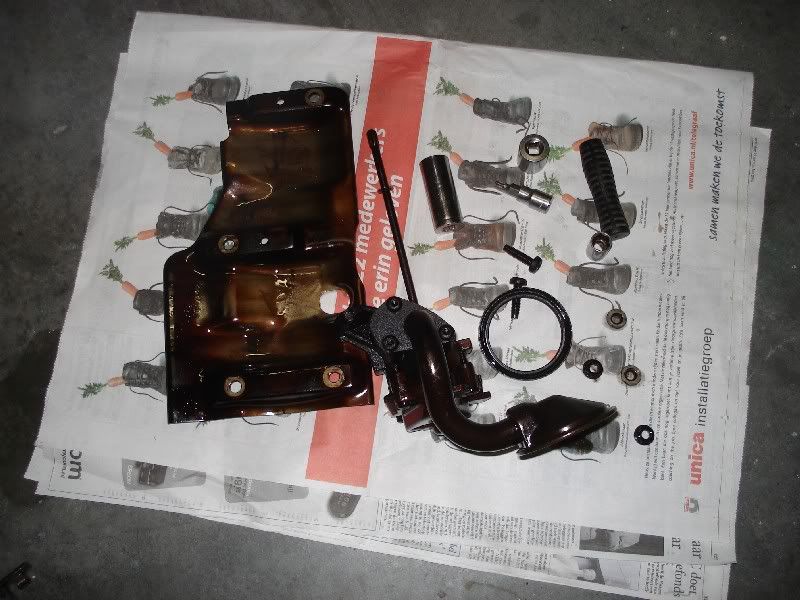
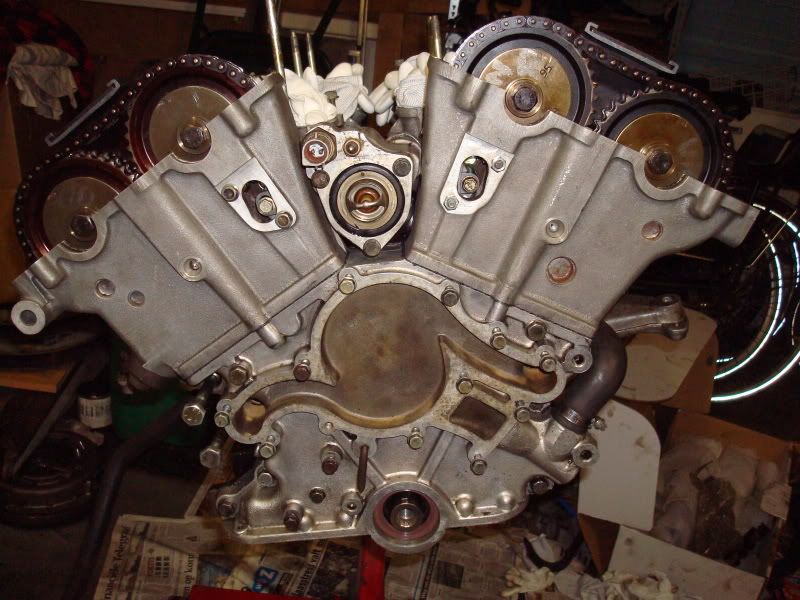
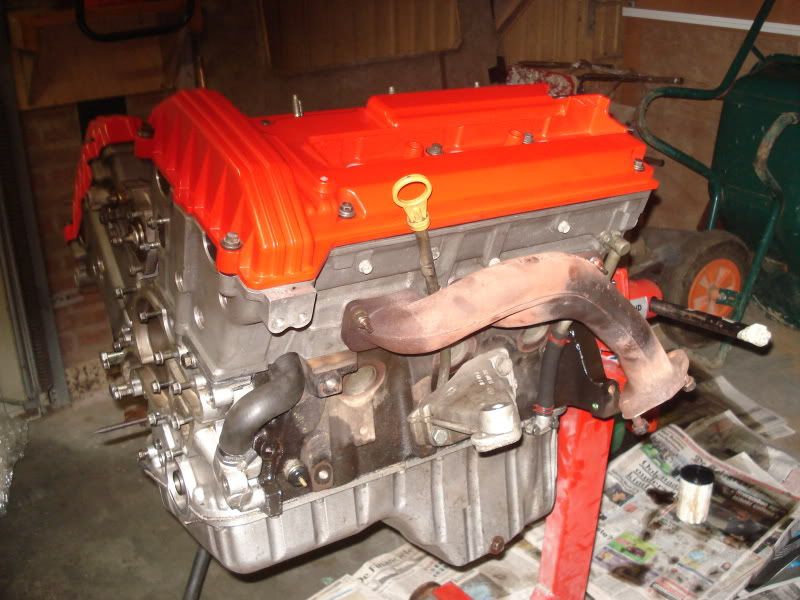
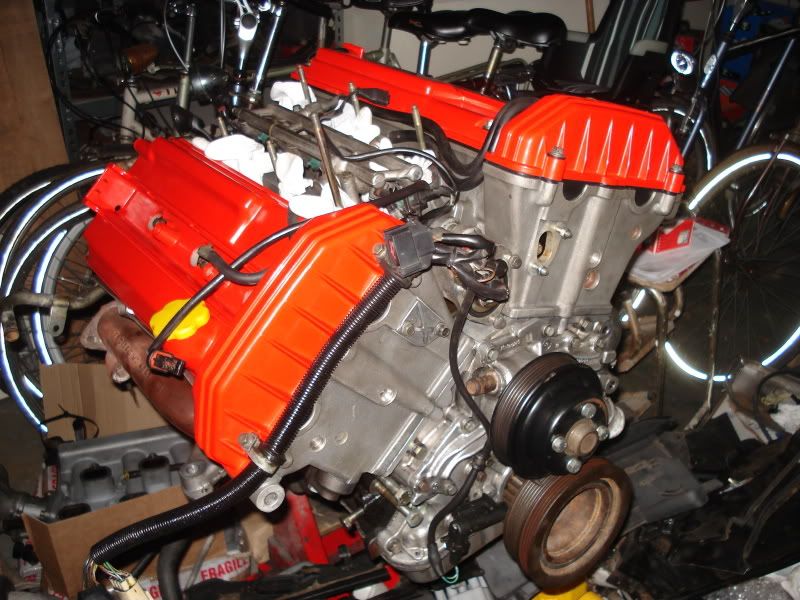
I had the cam covers blasted and powder coated.
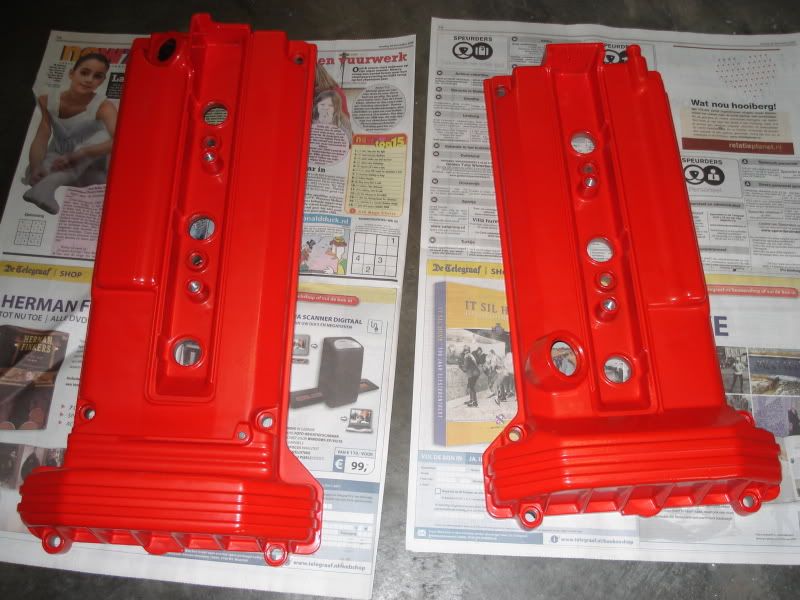
And fitted them afterwards. Before fitting them I thoroughly checked for any blast material inside the covers, but there was not one in there.
In the pictures it seems a bit orange, but in real life it's a nice red colour.
I knew of all the horror stories with blasting and powdercoating, therefore I didn't do the plenum.
Re: My Sierra saloon
I also took the oil pump apart to check it for wear.
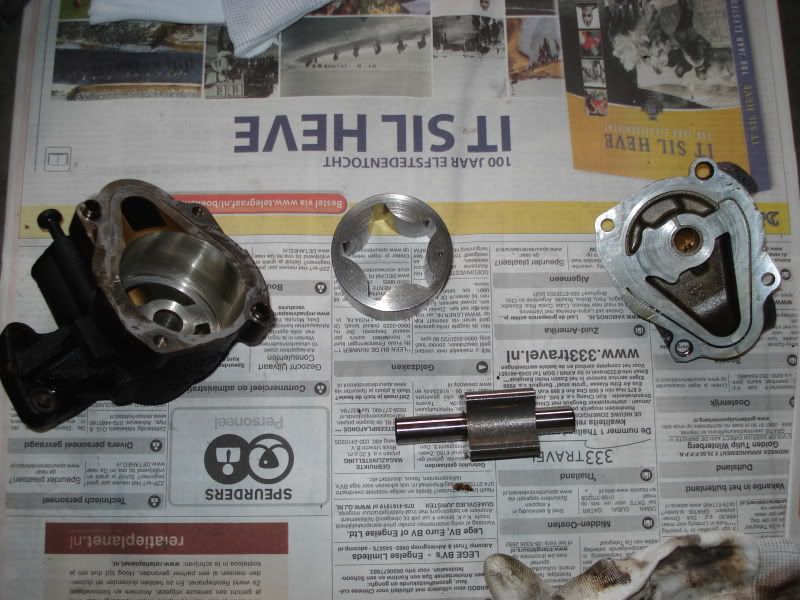
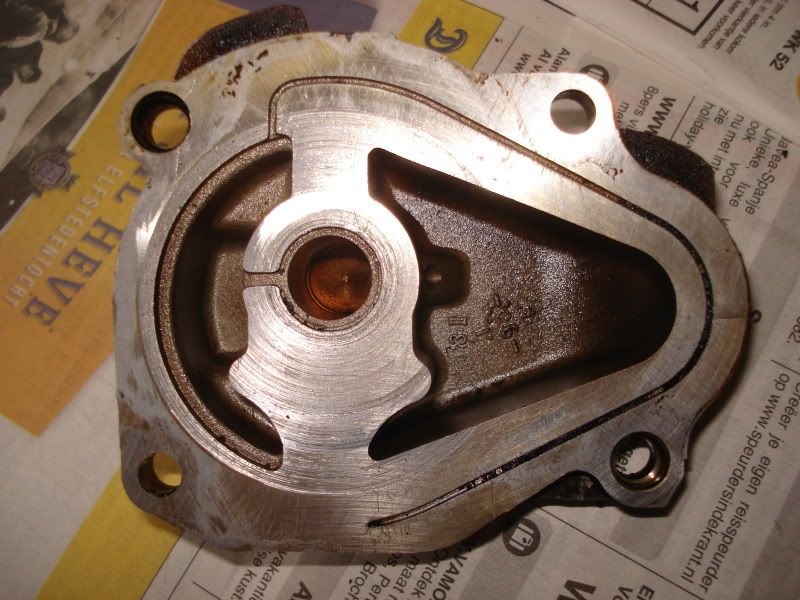
I thought it look quite OK, so I put it back together.
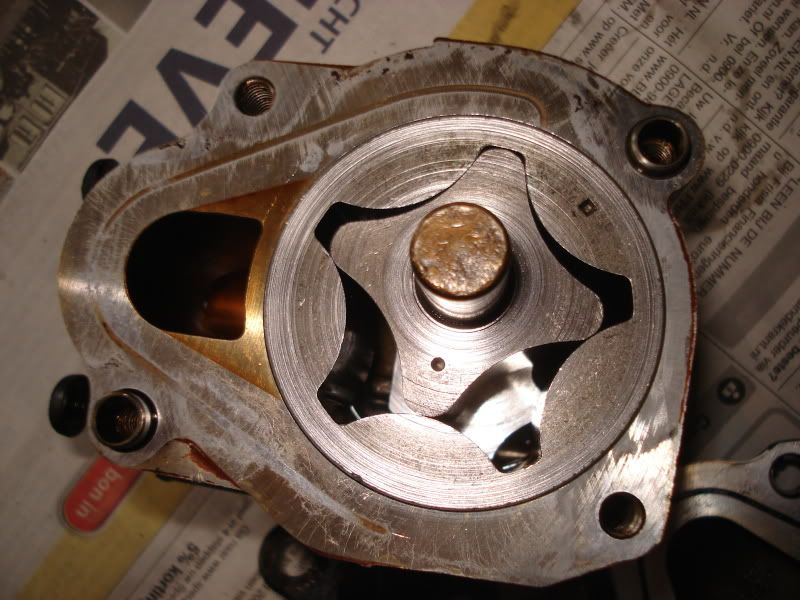
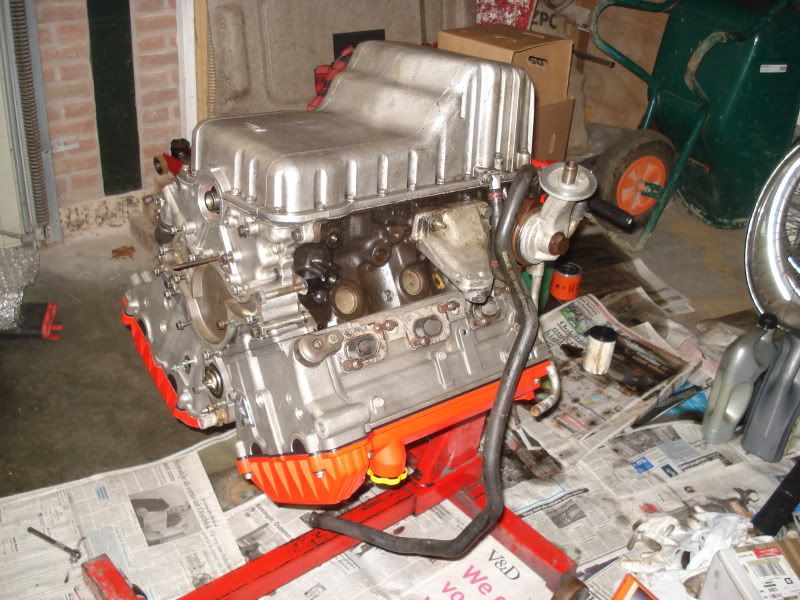
And bolted it back on the engine.
After that the sump could be mounted again.
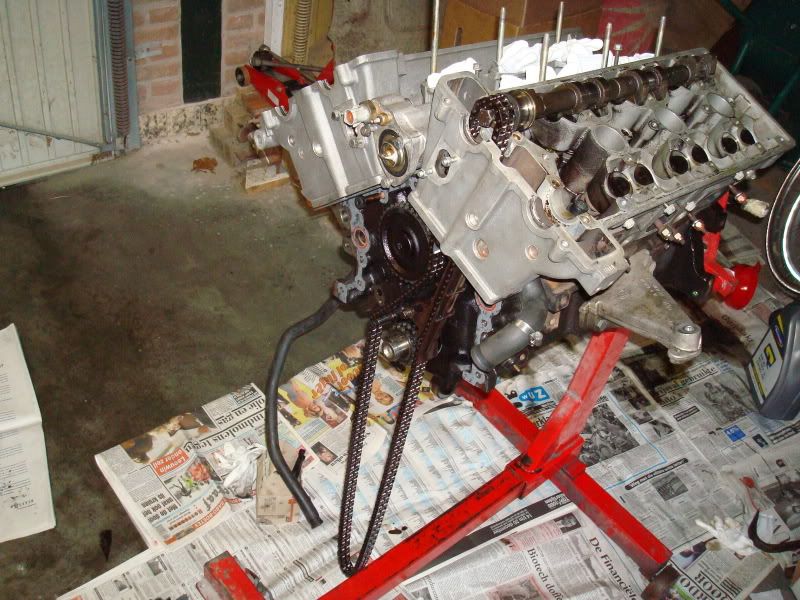
Fitted the exhaust manifolds.
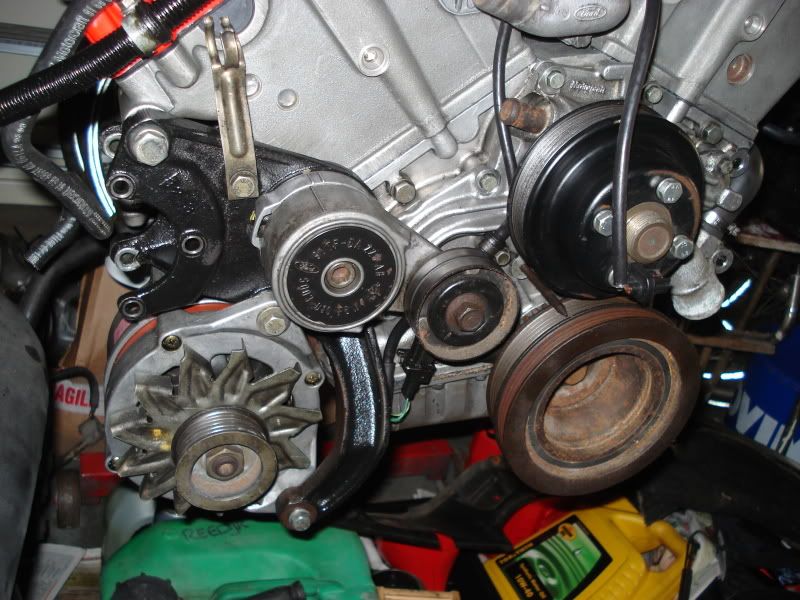
And the crank pulley with the water pump.
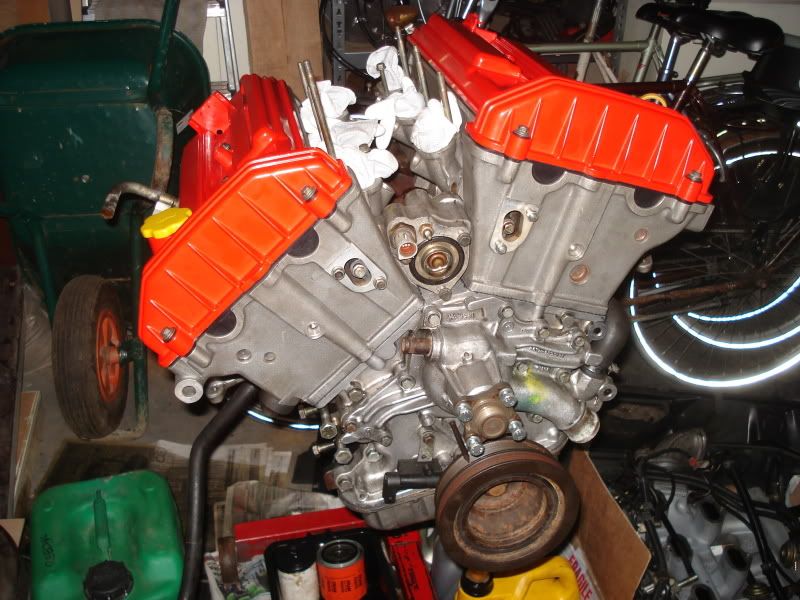
The water pump pulley and fuel rail with injectors.
Alternator with bracket and tensioner...
I thought it look quite OK, so I put it back together.
And bolted it back on the engine.
After that the sump could be mounted again.
Fitted the exhaust manifolds.
And the crank pulley with the water pump.
The water pump pulley and fuel rail with injectors.
Alternator with bracket and tensioner...
Re: My Sierra saloon
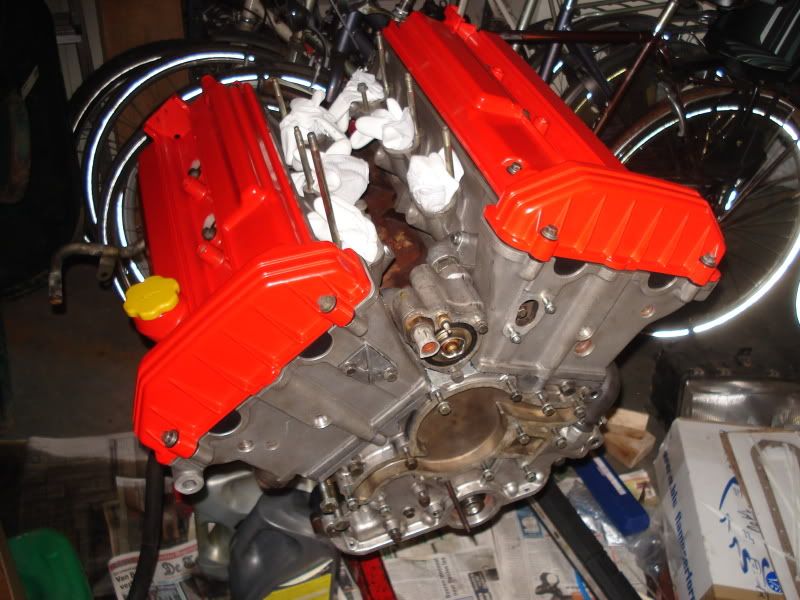
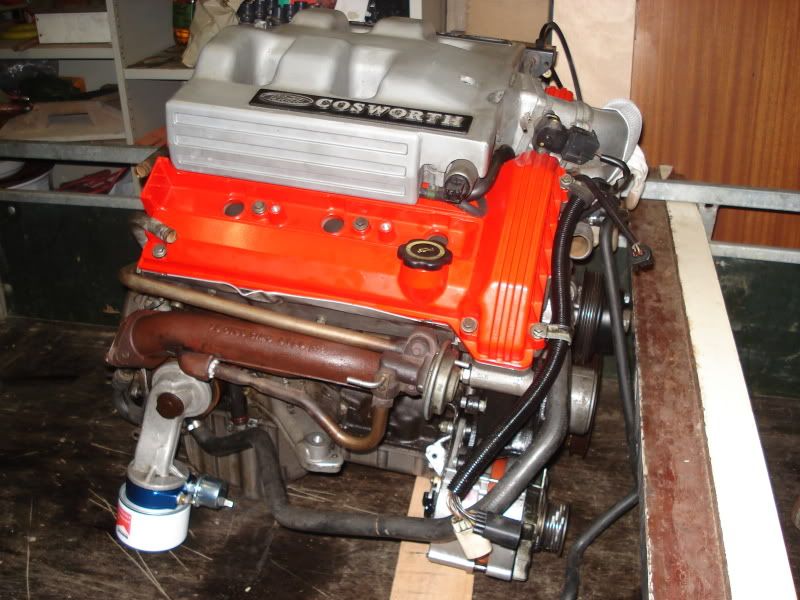
Fitted the plenum together with the EGR valve and piping.
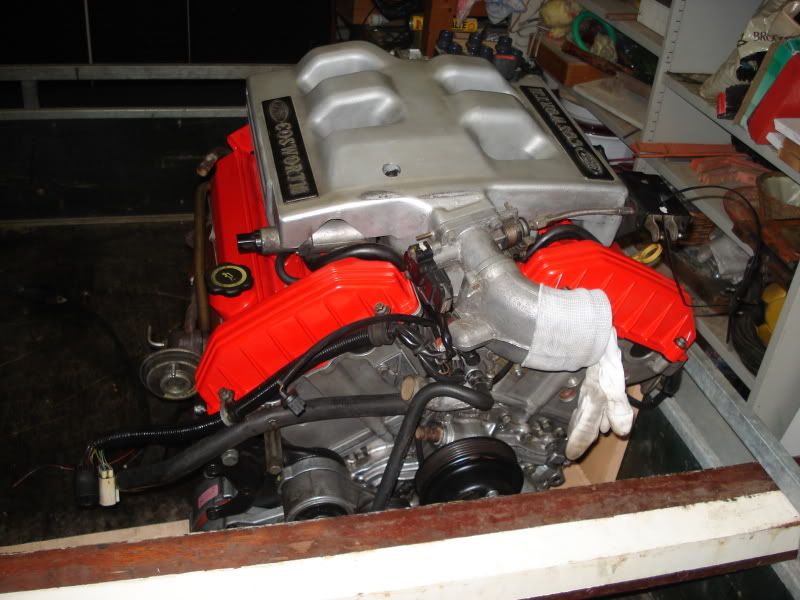
I also fitted a sandwich plate between the remote arm and oil filter, so I could fit an oil pressure and oil temperature sensor.
And refitted the flywheel and clutch.

I also fitted a sandwich plate between the remote arm and oil filter, so I could fit an oil pressure and oil temperature sensor.
And refitted the flywheel and clutch.
Re: My Sierra saloon
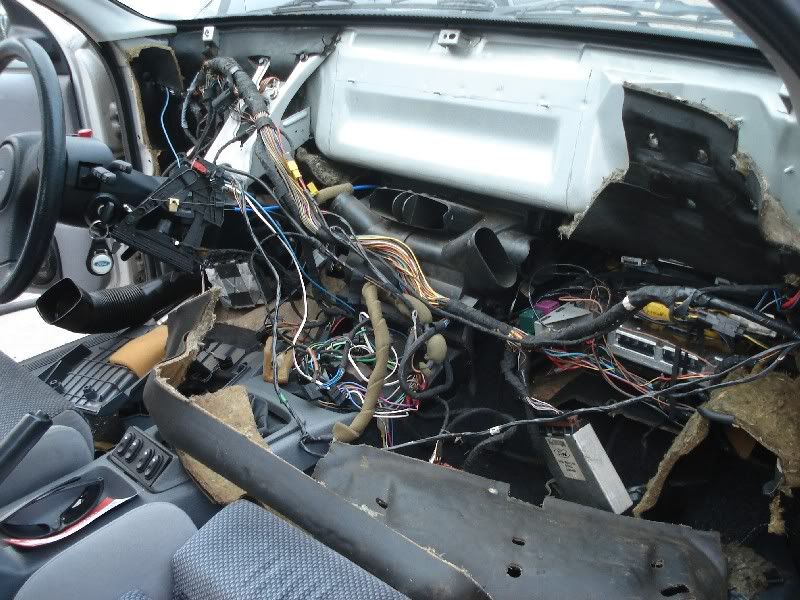
Since the engine was still not in the car and I had been planning to retrofit aircon for a while this seemed like a nice moment to make some preparations.
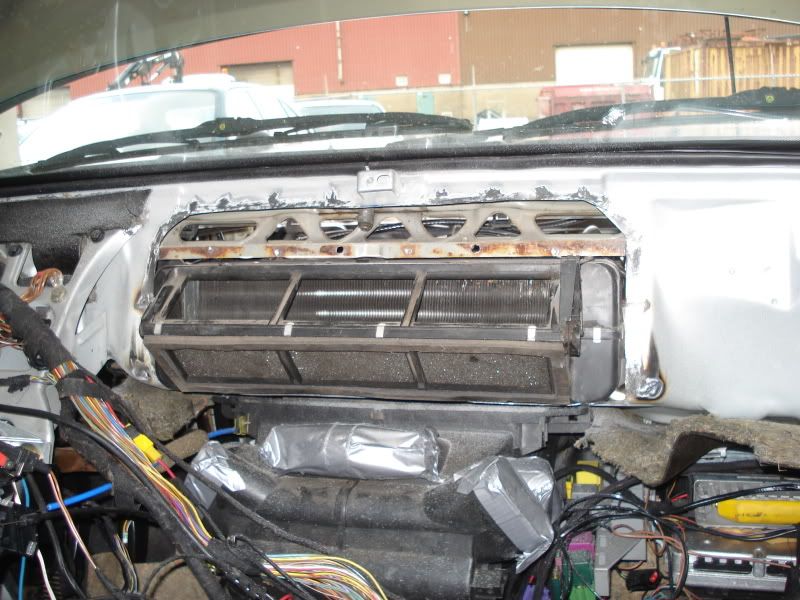
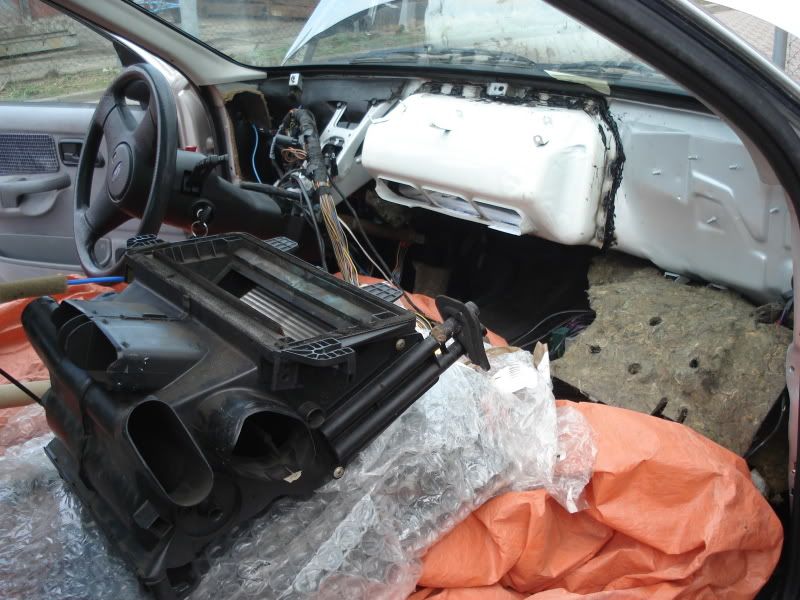
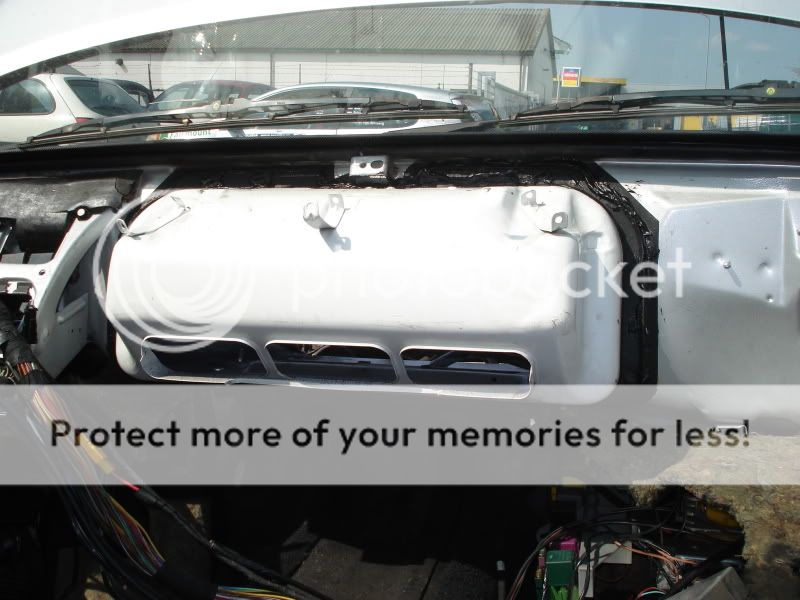
On a Sierra fitted with aircon, the bulkhead is different because the vaporizer slides halfway through. So I started taking the dash out and removing some sound deadening material from the bulkhead. After that I measured and marked the part that needs to be removed.
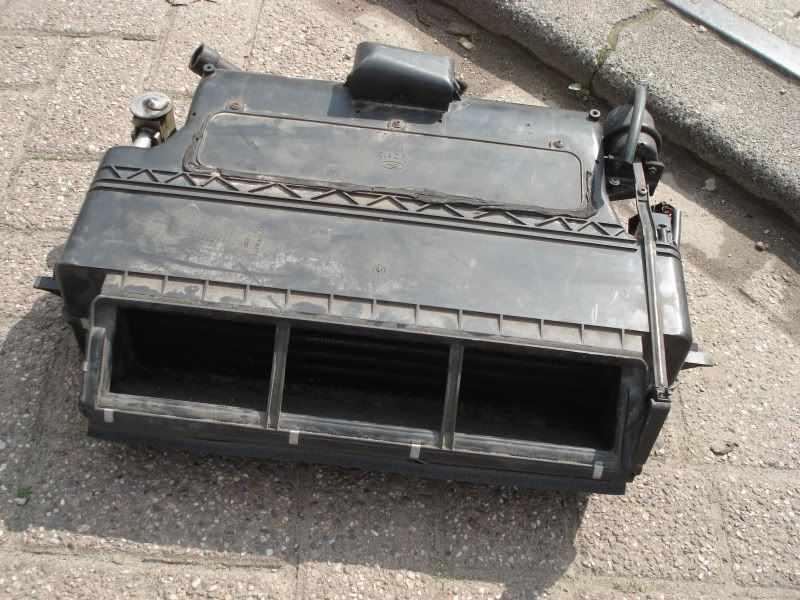
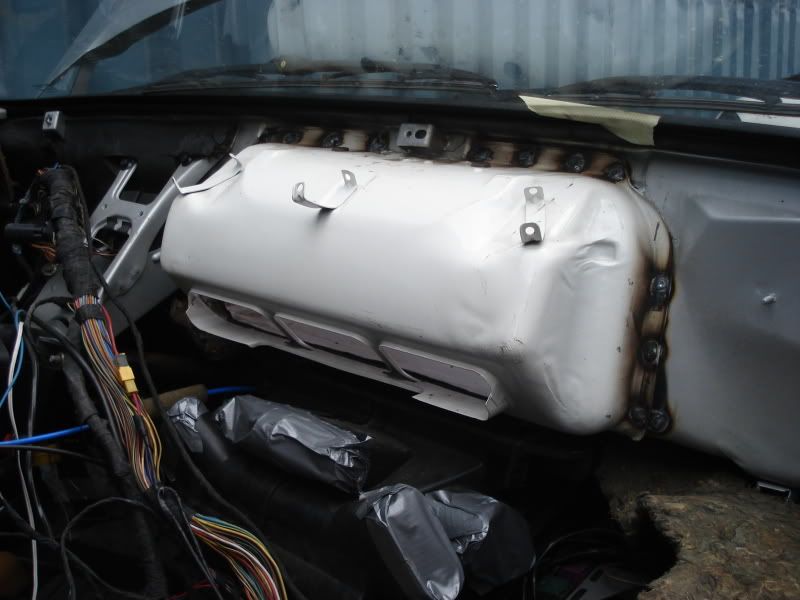
The aircon vaporizer is fairly big.
So I took the angle grinder, drill and hacksaw to make a nice big hole in the bulkhead.
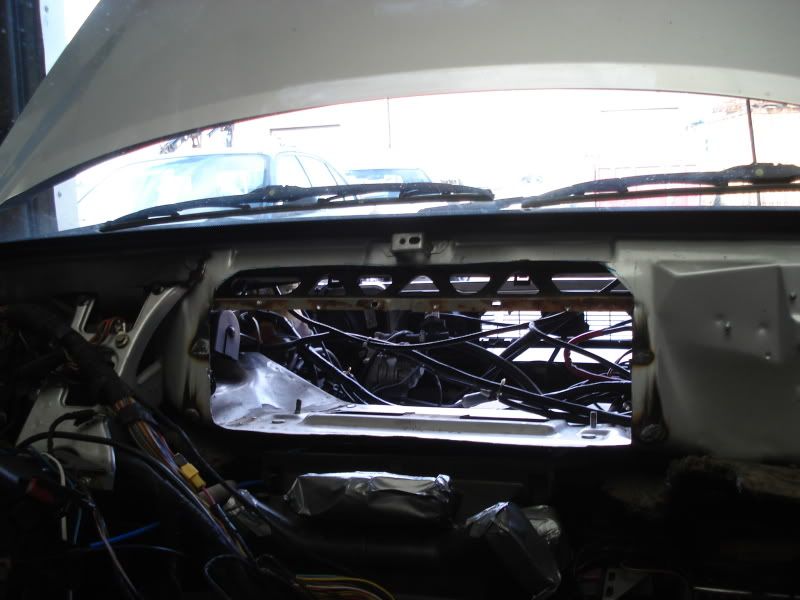
Seen from the engine compartment...
And trimmed the edges so the vaporizer fitted neatly.
On a Sierra fitted with aircon, the bulkhead is different because the vaporizer slides halfway through. So I started taking the dash out and removing some sound deadening material from the bulkhead. After that I measured and marked the part that needs to be removed.
The aircon vaporizer is fairly big.
So I took the angle grinder, drill and hacksaw to make a nice big hole in the bulkhead.
Seen from the engine compartment...
And trimmed the edges so the vaporizer fitted neatly.
Re: My Sierra saloon
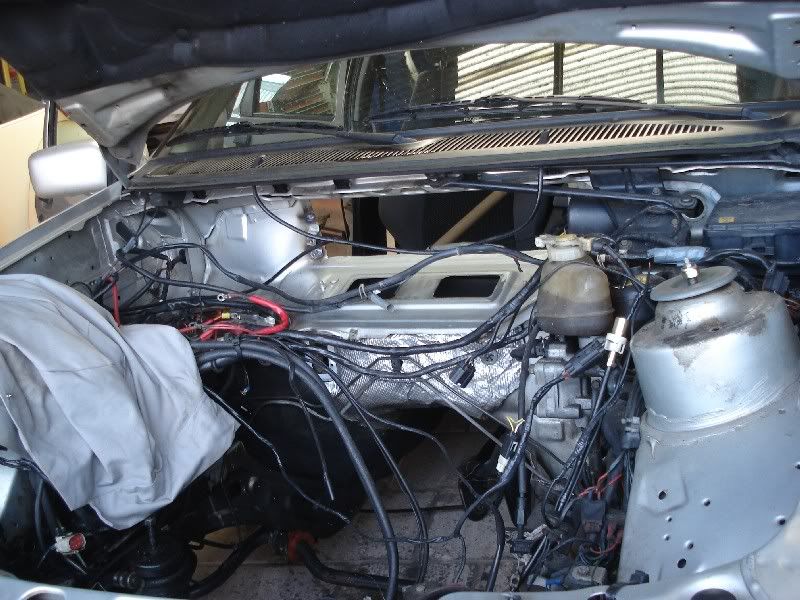
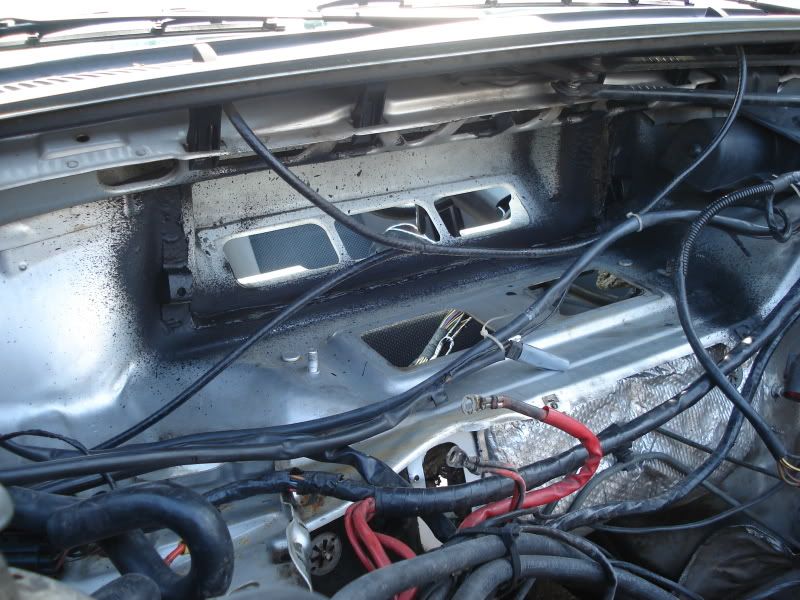
Together with the aircon kit I got the metal "box" that is normally fitted to the bulkhead. It's welded to the bulkhead on the holes where I drilled out the spot welds.
The vaporizer also needed two brackets on the bulkhead. Unfortunately I didn't have those, so I bent some small metal plates in shape. Welded a nut on the backside and welded the brackets to the bulkhead.

After that I sealed all the grooves on the in- and outside.
And also sprayed everything to make sure it won't rust.
The vaporizer also needed two brackets on the bulkhead. Unfortunately I didn't have those, so I bent some small metal plates in shape. Welded a nut on the backside and welded the brackets to the bulkhead.
After that I sealed all the grooves on the in- and outside.
And also sprayed everything to make sure it won't rust.